French knots are perhaps one of the most critical stitches for an embroiderer to know. There are very few commercial embroidery kits that do not make use of this stitch to create eyes, flower parts or a multitude of other features.
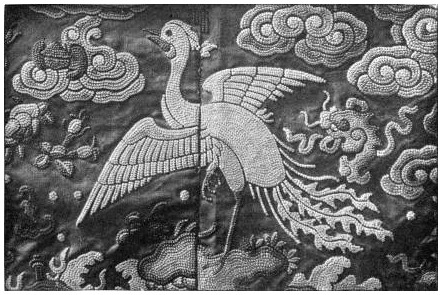
Of course, French knots are not limited to details and can be used to make an entire piece like was done on this vintage Chinese embroidery.
It’s such a shame the original photo was only black and white, the original piece must have been truly beautiful and probably no longer exists.
How to Sew French Knots
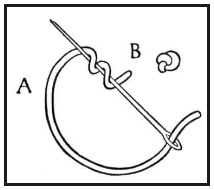 It’s not hard to make French knots, but you might need to practice a bit before working on your ‘real’ project.
The good news is the most common mistake, winding the thread around the needle incorrectly, only creates a tiny stitch that is easily covered up by a successful French knot.
The trick is winding the thread on the needle in the right direction and keeping the tension on the wrapped thread.
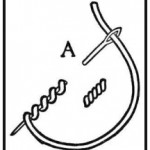
Hopefully, with the two different illustrations and the instructions below, you shouldn’t have any trouble.
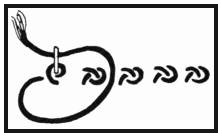 If using a pre-printed fabric, bring the needle up through the dot used to represent where the French knot should be; otherwise, bring the thread up where you want the knot to be. Take hold of the thread and make two loops on the needle where the first loop is made very close to the fabric. Twist the needle and insert it next to the point where you came up through the fabric, holding the thread tightly and putting your thumb over the twists/knot. Pull the thread completely through and only let go of the knot when all of the thread has passed through the fabric.
To make a larger knot, simply add a few more loops.
Fortunately, if you make your French knot incorrectly, you might end up with just a tiny stitch that can easily be covered up with a completed knot. If you do not hold the loops tight, your knot may have a floppy loop that will ruin the bead-like look of your French knot.
