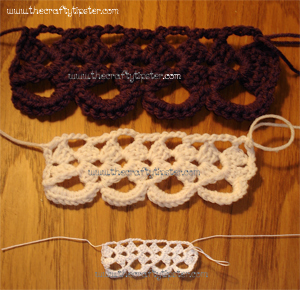
This is a simple little crochet flower edging that looks a bit like granny squares with a loop at the bottom. The crochet edging is worked top to bottom rather than side to side as you will see once you give it a try. The only drawback with this particular crochet edging is that it will only look nice if you end after making one of the bottom loops which may make it too wide or narrow for whatever item you wish to attach it to.
I think it would make a great edge for a scarf, cuff of a sleeve or just about anything. As you can see from the picture, this crochet edging can be worked with any size needle or yarn without making adjustments to the pattern. The purple edging used Red Heart Worsted, the baige one was made with a bit of mystery yarn from my stash that’s similar to baby weight, and the white crochet edging was made with Aunt Lydia’s Crochet Thread size 20.
Crochet Stitches Used
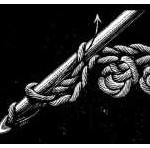
Slip Stitch – Stitch is made by inserting hook into foundation, yarn over hook and pulling yarn through the foundation and the loop on the crochet hook at the same time.
Single Crochet (sc) – Insert crochet hook into foundation, yarn over hook, pull loop through. Yarn over hook and pull through both loops on hook.
Double Crochet (dc) – Yarn over hook, insert hook into foundation, yarn over hook and pull through foundation. Yarn over hook and pull through 2 loops on your crochet hook. Yarn over hook and pull through last 2 loops on hook.
Treble Crochet (tc) – Yarn over hook twice before inserting into foundation. Yarn over hook and pull through foundation, work loops off of hook two at a time.
Granny Square Style Edging
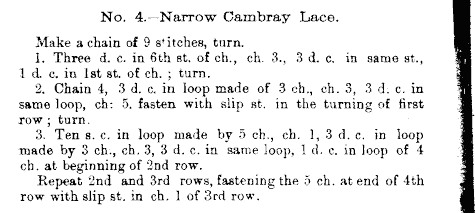
Original instructions:

The Crafty Tipster’s Version
I made a few minor changes to the original pattern and rewrote it in hopes of making it a little easier to follow. I thought the original tended to curve on the top so I added a bit more stitching to make it straighter. Additionally, the original did not explain how to end the edging to make both sides look fairly similar.
NOTE: The letters A-C are there to make it easier to see where the next instruction is referring to. This crochet edge pattern is a little tricky but once you get going it’s fairly easy to make. Additionally, due to the nature of how this lacy edging is formed any mis-shapen stitches should be removed as it is unlikely they will be hidden by the next row. (If you study the middle example, you can see one of the single crochets in the second loop across the bottom is a bit sloppy.)
ROW 1: Chain 9.
ROW 2: 3 dc into 6th stitch from hook, chain 3 (A), 3 dc in same stitch, 1 slip stitch in 1st stitch of chain (B), turn.
ROW 3 (1st time): Chain 5, 3dc in chain 3 (A) between two sets of 3dc, ch 3 (C), 3dc in chain 3(A) loop, ch 5, slip stitch into turn on step 2 catching a loop from the dc and a loop from the original 9 stitch chain, turn.
ROW 3 (after 1st time: Chain 5, 3dc in chain 3 (A) between two sets of 3dc, ch 3 (C), 3dc in chain 3(A) loop, ch 5, slip stitch into gap between dc and 10 sc covered loop, turn. (Skip to step 6 when edging is long enough for your needs)
ROW 4: 10 sc into 5 ch loop of step 3, ch1, 3 dc in loop created by ch 3(C), ch 3, 3 dc in same loop, 1 tc into chain 5 from step 3, turn.
ROW 5: Repeat steps 3 & 4 for desired length.
ROW 6 (final row): 10 sc into 5ch loop of step 3, chain 3, slip stitch into chain 3 loop, chain 3, slip stitch into chain 5 turn, end off.
Please let me know if you give this free crochet edging pattern a try.


Thanks for giving the steps of crocheting the work. I liked this crocheting floral edges very much. I would be thankful to you if you keep updating with new patterns. Thanks.
with regards
prasanna
It is nice to see some of the old patterns being translated to new crochet terms. This is great for the younger crochet enthusiast out there. I find that due to my age, I tend to understand the old pattern better than I do the new version. Thanks for putting them both up to see at the same time.
You are most welcome Pallie. Hopefully, I’ll be posting some new ones soon.
I was looking for a continuous granny square to use as edging on a shirt cuff. Found this pattern and modified by reducing the length the 5 chain and no single crochet over that chain. Using Aunt Lydia’s “Denim” quick crochet thread. Thanks for the pattern and mental lift from the small creative leap on my part.
Connie