Ho! Ho! Ho! Merry Christmas.
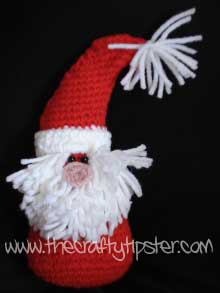
Meet our first Amigurumi-inspired Santa Claus.
The crochet Santa pattern and instructions are a little long, but are fairly easy. Even the beginner should be able to make this crochet Santa. An alternate placement of the eyes is shown below.
Crochet Stitches Used
Unless otherwise noted, all stitches are standard single crochet (insert hook into previous row, yo, pull yarn through, yo and pull through both loops on crochet hook)
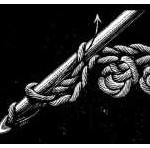
Slip Stitches are made by inserting the hook, yo, and pulling the yarn through both the stitch and the loop on the hook.
Decreases are made by inserting hook into first stitch, yo and pull through leaving 2 loops on the hook. Insert hook into second stitch, yo and pull through stitch and 2 loops on the hook, leaving one loop on crochet hook.
Increases are made by simply making two single crochets into a single stitch from the previous row.
To crochet Santa you will need the following materials:
- Red 4-ply acrylic yarn. (I had some mystery yarn that I used, probably a bit of Red Heart.)
- White 4-ply acrylic yarn. (Also probably Red Heart or similar.)
- Small amount of pink yarn. (Same weight as red and white yarns)
- 2 small black beads (I used 6mm plastic ones)
- Stuffing
- Plastic pellets for weight (optional)
Measuring Tools
- 8 1/2 by 11 notepad
- Small can of tomato paste
- Tube of Lip Balm
(These strange items will be discussed later.)
Crochet Santa Hat Brim
Must be made first!
Row 1: Using white yarn, ch 22 and join
Row 2: 25 sc in ring, add 2 or 3 sc over the join to hide the join and ch 1
Row 3: crochet around, slip stitch to join, and ch 1
Row 4: crochet around with a decrease somewhere in the row but away from the join, slip stitch, cut end, slip stitch and pull end through.
Slide your hat brim onto red yarn like a bead. Make sure Row 4 is facing the yarn skein or ball and Row 1 is facing the cut end. If you don’t make the brim and string it on the red yarn before you start your Santa’s body you will have to end and cut the red in order to get the brim on. – Why mess with that when all you have to do is make it first?
Crochet Santa Pattern for the Main Body & Hat
Row 1: using red yarn, 6 sc in ring. (Use magic crochet circle technique or other traditional technique.)
Row 2: increase in every stitch (12), ch 1, slip stitch into 2nd stitch from hook
Row 3: increase in every stitch (24), don’t join, start working in spirals
Row 4: increase in every third stitch (32)
Row 5: [1sc, 2sc (inc), 1sc] around (43)
Row 6: crochet around (43)
Row 7: increase in alternate stitches, starting with second stitch in row (64)
Row 8: decrease in alternate stitches, starting with first stitch in row (43)
Row 9: crochet around with decreases in stitch pairs 1/2, 15/16, 25/26, and 33/34 (39)
Row 10: crochet around with decreases in stitch pairs 12/13, 28/29 and 36/37 (36)
Row 11: crochet around with decreases in stitch pairs 7/8 and 19/20 (34)
Row 12: crochet around with 1 decrease anywhere in row (33)
Rows 13 – Row 24: sc around with 1 decrease anywhere in row ending with 22 stitches. Be sure to stagger your decreases around the row otherwise you will not have a nice round shape.
(UPDATE: 12/12/08 – Please be mindful of the correction to Rows 13 – Row 24. Those rows should be done in single crochet, not double as was originally listed. Thank you Laura for letting me know, hopefully no one else will have to endure the confusion caused by my original typo.)
The next steps will show why we made the hat brim first.
Slide the hat brim down over the body of your crochet Santa until the top of the brim is even with the top of the body.
Row 25: Crochet around going through both the hat brim and the body. Be mindful that you will have to match 2 stitches on the brim to only 1 red stitch of the body in several places to ensure your hat brim lays flat and even. If you watch how the stitches line up as you work your way around, when you find yourself having to enter through the brim at an angle to get to the red/body stitch, that’s when you should make two stitches through the same red stitch. (Hopefully, this is more clear when you are doing it then I’m making it sound.)
Mark beginning of row (we won’t be joining, but we’ll need to keep track. Once you make a few rows it will be obvious where each row starts and it will be easier to not use a marker.)
Rows 26-30: As you work your way around the row, on one side increase 1 stitch and on the opposite side decrease 1 stitch. Squish and fold your hat in half to remember where you made the increase and decrease. Folding will also help to make your decreases tighter. Be careful not to crochet your hat closed.
Rows 31-34: Make 2 decreases and only 1 increase.
Rows 35: Make 3 decreases and 1 increase.
Row 36-38: Make 3 decreases and 3 increases.
Row 39-40: Make 3 decreases and 4 increases.
Row 41-42: Make 3 decreases and no increases.
Slip stitch, cut yarn leaving long tail, slip stitch and pull tail through. Insert crochet hook from opposite side of where you ended, drape tail over edge and pull through; pulling to begin closing the opening. Turn your crochet Santa and insert your hook from the opposite side, drape the tail over the edge and pull through. Continue weaving the tail over the edge and out other side until opening is sealed and flat.
Tipster Trick: Leave a long tail when you finish the hat. After you sew the opening closed, slide the yarn under and over several stitches opposite the tassel to round off that edge a bit. Make sure you always move the yarn over the existing stitches following a path the yarn has already taken. If you move the yarn in a direction that does not match the underlying stitches it will be unattractive and noticeable. To see a how-to that further explains this technique, please visit the post – crochet finished edge.
Tipster Trick 2: Slide the yarn under the stitches to where you made the decreases. Weave the yarn in and out of any gaps made by the decreases, always making sure to follow the same paths the original stitches made. This will help to close the gaps and hide your stuffing.
Crochet Santa’s Mustache
Row 1: Using white yarn, ch 8, turn
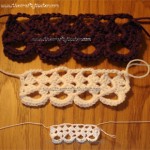
Row 2: Here’s where the lip balm comes in. I warn you that the first stitch will be like a wrestling match where the yarn, hook and lip balm tube will all conspire to drive you mad. Wrap the working end of the yarn around the tube. Insert your crochet hook into the chain and pull the yarn through, keeping a loop around the tube of lip balm. Finish making the double crochet. Continue working across the row by first looping the working end around the tube and then making the stitch. End leaving a longish tail (you will use the tail to attach the mustache to your crochet Santa) and tie off.
Crochet Santa’s Nose
Using pink, 7 sc circle, slip stitch to join, ch1 pulling cut end through leaving about 6-8 inches of yarn for the tail. Finish the edge by wrapping the yarn through the loops as described in our finished crochet edge tutorial.
Attach your nose to the middle of your mustache on the loopy side. Use the tail of yarn from the nose to secure the nose in several places on your mustache. Be careful not to distort the round shape of your nose as you do this.
Santa’s Hat Tassel
Using 10 pieces of white, approximately 2 and 3/4 inches long, make a tassel. Using a longer piece of the same yarn tie the 10 pieces in the middle. It won’t look like that much at this point – remember we’re not making a pom-pom. Use the longer piece to tie the tassel onto the top of your Santa’s hat. Thread the yarn through another nearby stitch and tie another knot. When you think the tassel is secure and positioned where you want, cut the long ends to the same length as your tassel.
Santa’s Beard
You might have something in your home that would work better than a tomato paste can – the goal is to end up with short pieces of white yarn approx 3 inches long. Another option would be to cut a piece of cardboard 3 inches wide.
Using your tomato paste can or cardboard, wrap the white yarn around the can with a consistent tension (if you pull tight, pull tight on every loop). Carefully cut through all the loops even with where you started. Don’t wrap the yarn on top of each other like you would when making a yarn ball as the strands on top will be longer than those on the bottom.
Take each strand and cut it in half.
To attach each piece of yarn to your crochet Santa, fold the piece of yarn in half and pull the loop through one of your crochet stitches. Slide the cut ends through the loop and pull the loop secure. If you’ve ever made a latch hook rug, this is essentially what you are doing.
Form a V pattern. Work from the bottom up with the first row having only 1 piece, the second row having 3, etc.
When you get to about 4 rows below the hat brim, attach the mustache on top of the beard at the top row. The mustache should hide the stitches you made attaching the beard pieces. Use the cut ends of your mustache to attach the mustache and nose to the main body of your Santa.
Santa’s Hair
I wrapped the yarn around the short side of an 8 1/2 by 11 inch pad. I cut the yarn to make 8 1/2 inch pieces and then cut those pieces in half. The goal is to create pieces about 4 1/4 inches long.
Use a combination of hair and beard pieces to hide the stitches (latch hook stitches). Flip the hat brim up and out of the way to attach several of the cut pieces ‘under’ the brim. Pull the brim down and over the latch hook stitches. The best way to do this is to use the longer pieces (hair) on the far sides of the beard, two rows should work. I put one row completely under the brim and the second row directly under it.
Eyes
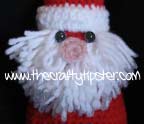
Sew on two black beads for eyes.
You can make you Crochet Santa with 2 smaller close together eyes (6mm beads) as at the beginning of this post, or you could use slightly larger beads and leave a little more face showing to create the look shown to the left.
That’s part of what makes this crochet Santa pattern so fun, everyone’s Santa is bound to look a little different.
