Ever go through your website and find wonderful posts that for some odd reason you wrote but never actually posted. Well, this would be one of those posts. I originally wrote it three years ago. While most folks think of Valentine’s Day celebrating love between a man and a woman; this year I dedicate this post to my sweet Tali. She may be gone, but, she lives on in my memories and in fun photos like the one in this post.
The Inspiration
I found a wonderful paper mache tutorial from a talented paper mache artist. Jonni has written books on the subject and still generously shares a great deal of information on her blog.
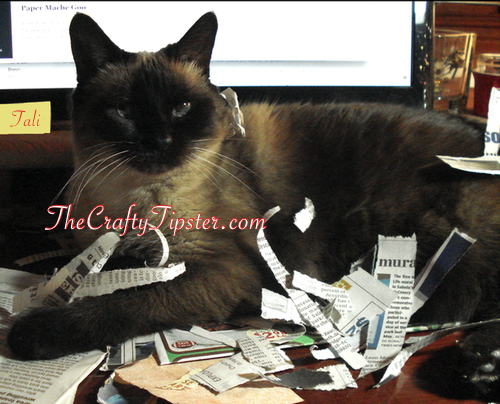
First a quick warning. My favorite feline helper could not resist a pile of little shreds of paper. Just perfect for rolling in and pushing off the desk onto the floor – not a surpise. The warning comes in the form of “Who knew cats would think paper mache goo with a bit of cinnamon is tasty?” Thankfully, I caught her mid-lick otherwise my blue-eyed friend might now have a paper mache’ed tongue.
I’ve been following the paper mache bluebirds tutorial. Her speed drying technique involves the oven. I am making some little paper mache hearts for Valentine’s Day to decorate our little holiday tree. I didn’t want to add the expense of lighting the oven. I’m on the third day of my project – I’m beginning to wonder if I should have used the oven.
Making the Forms
I used some of our thin tinfoil sheets. They are a great cost saver in the kitchen – a little thinner than regular rolled tinfoil but super cheap in comparison and it works great for lining pans, protecting foods from getting too brown in the oven and craft projects. It is too thin though for most bar-b-queing applications though, so it’s not a total replacement for the rolled stuff.
Anyway, first, I gently wrinkled up the foil. That seemed to make it easier to work with. I kinda made a ballish-shape with wings and then indented it at the top to form my hearts. They are somewhat flatter than I had hoped for but should work great for my ornaments. I probably could have made my hearts puffier by adding smaller balls of foil to the top of my hearts.
Paper Mache Goo
I read Jonni’s blog and several others before getting started. Another blog mentioned adding a bit of cinnamon to make the paper mache smell nicer. Cinnamon is such a great anti-bacterial that I thought it wouldn’t hurt to add some, along with salt to prevent mold. She recommended “raw” mache or no cook paper mache – raw flour, water, a little salt (and in my case a sprinkle of cinnamon). Yay, dump, stir and use – my kind of paper mache goo.
Masking Tape
You know how the experts almost always cover their forms with masking tape? There’s a reason for that and I learned it the hard way. Paper mache doesn’t stick to tin foil – at least not newsprint. When I used toilet tissue and facial tissue it would stick but oh what a gooey mess that stuff made. It also took longer to harden; though I think it might be a little harder than the newsprint ones.
If you want to make these paper mache hearts for Valentine’s Day, find the cheapest masking tape you can. The stuff I used was super cheap and tends to split – not good for an important project but just fine for a project where it’s going to be encased in plaster anyway.
Working with Paper Mache
The last time I worked with paper mache, I was a kid. We probably did a balloon project. The paper strip size was fairly large. It was big, messy and easy to apply the layers. My hearts were small, full of edges and I was trying to keep the mess factor down. I found with my hearts that smaller paper pieces was much better. Getting the paper to wrap smoothly around all of my edges was a definite challenge without using smaller strips and even some oddly shaped pieces.
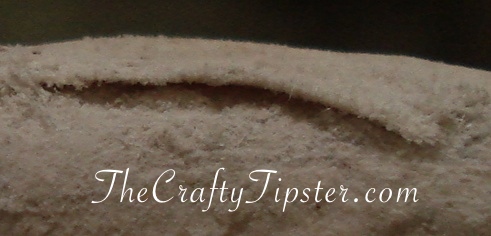
I fussed and worried when I couldn’t get the paper to lay nice and flat around the bends. I took a chance and left them. I trimmed some with a nippers but the far easier solution was to just sand them down. Who knew, even paper not fully attached to the hearts would sand away into a fine dust?
Before Sanding…
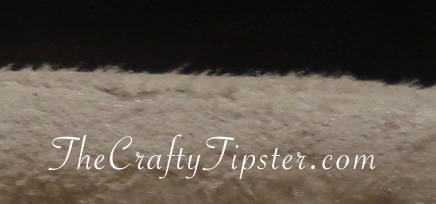
After Sanding . . .
I didn’t use my oven but my work table sits over a heat register. It’s January, it’s 30 outside, why waste all of the great blowing hot air? Again, I experimented a bit. If you can peel Mod Podge off of wax paper without destroying the project, surely a half-dried paper mache heart would peel off of waxed paper too. It worked. And, it worked well.
My hearts were on a book wrapped in wax paper (the book was simply a way to make it easier to place the hearts near the heat register), under my table next to the heat. I turned them a few times during the day and they dried far more quickly than my test tissue paper heart did. It took several days for the tissue heart to dry but I didn’t think to put it by the heat. If, and when, I make another project, I might try putting a plastic tub over the top of the register and the project to create a mini-oven and see if that speeds things up a bit. Or, maybe just use the oven.
A fringe benefit of that dash of cinnamon? My work room smelt like cookies. The downfall of the cinnamon? – it darkened the color of the paper mache and gave it a bit of a speckled appearance.
Day 3
The first two days of this project were building up layers of paper mache and newspaper and waiting for it to dry. I have some blank newsprint and being the cheap gal that I am – the first layer was our local paper, the second layer was the purchased paper.
Today, I got impatient. I probably should have added another layer of paper mache. But, I’m running out of time and I want to get to the fun part – decorating my hearts.
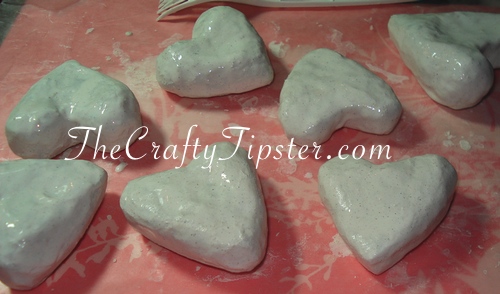
Per Jonni’s instructions, I took some of my leftover paper mache goo and mixed in some glue and white paint to use as a skin coat. I thinned it a bit more with some water too – the goo had gotten a little thicker overnight. Jonni suggested using wood glue. I couldn’t find ours so I dumped in some school glue. She mentioned using the glue to help prevent cracking. While the wood glue is designed to be sanded, my hope is the rubbery acrylic in school glue would work as well to fight cracking.
Impressions so Far
I’ve wanted for several years to make something with paper mache. I wanted to pull out the paints and have a blast. Most of my projects involve felt, yarn and fabric so painting and sculpting are usually not something I get to do.
They’re not done yet. At least another day or two for skin coat drying and sanding. The surface is more uneven than I had hoped but hopefully the skin coats and next rounds of sanding will smooth things out more.
Clearly, obtaining a smooth porcelain-like surface takes practice. Even with repeated sanding, the surface is smooth, but covered with numerous hills and valleys.
As much fun as it has been getting gooey and making these, I’m not sure I would rather stick with making embroidered felt hearts. The felt hearts require a bit more skill and patience but the paper mache hearts for Valentine’s Day take too long – at least when you’re not using the oven.
To check out how I finished my hearts and my suggestions on making your own paper mache hearts – check out Making Paper Mache Hearts – Part 2.


