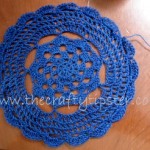
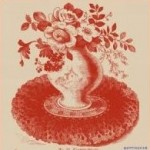
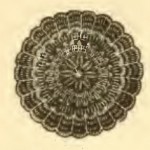
The unusual crochet doily pattern is another vintage crochet doily pattern we’ve found. The original crochet doily pattern designer suggests using this pattern to make a counterpane. To me, the pattern is interesting enough to be made into a doily or pillow cover. She also suggests using two colors. I think this free vintage pattern would look even prettier using multiple colors for each of the olives.
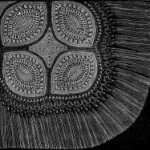
Two colours, which can be clearly distinguished from each other in the engraving, should be chosen from among the various combinations suggested; one of them should be very light, say, cream or white for the olive shaped figures and squares, and the other of some soft shade only darker, for the connecting rows and the knotted fringe.
Crochet Doily Pattern Stitch Definitions
As with many of these vintage crochet doily patterns, the author may use terms for the various crochet stitches that differ from what we use today. To aid you in making this doily, I’ve included instructions for those stitches referenced in the pattern.
Be mindful that all of the stitches in this vintage doily are made by inserting the crochet hook only into the back loop of the stitch from the previous row.
Plain Stitch – Insert hook into back loop of previous row’s stitch and draw up a loop. Yarn over hook and pull through both loops on hook.
Trebles – Yarn over hook, insert crochet hook through back loop of previous row and then take up the thread on the needle and bring it through two of the loops, take it up again, and draw it through the two remaining loops.
Double Treble – Worked the same way as trebles except before inserting hook into previous row, yarn over hook twice – meaning there will be three loops on your crochet hook before you insert the hook into the back loop of the stitch from the previous row.
Vintage Crochet Doily Pattern
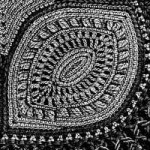
The olive shaped figures begin with 9 chain stitches, on which you make 8 plain stitches and on the 9th: 3 plain for the corner.
On the second side of the chain: 8 plain and 3 besides on the corner stitch, and so on for 3 rows; in the last row there should be 28 stitches.
These 3 rows are to be considered as one only.
2nd row—3 chain, 1 treble on the plain stitch that follows * 1 chain, 1 treble and repeat 11 times from *; 1 chain, 3 trebles with 1 chain between them on the corner stitch, ** 1 chain, 1 treble, repeat 12 times from **.
On the last stitch at the corner, again 3 trebles with 1 chain; close the round with 1 single stitch.
3rd row—1 chain, 1 single on the chain stitch that follows the 1st treble of the last row; 3 chain, 1 double treble between the lower trebles, 1 chain and so on, until you have 35 trebles, counting the two sets of 3 trebles at the corner.
4th row—here you can change the colour: 1 plain on each of the stitches of the last row; 3 plain at the corners.
5th row—similar to the 4th.
6th row—2 plain, 1 cluster of 2 double trebles on the same stitch of the 4th row as the 5th stitch of the last row is on; miss 1 plain.
Continue in this manner along the whole row, taking care that the 9th and 22nd cluster come just at the corner.
7th and 8th rows—these two last rows should be worked in the same colour as the inside of the figure.
Be careful always to make the increase at the point; a 9th row in the dark colour may further be added, to connect the figures, by passing the thread from the wrong side to the right, between the 13 last stitches of two of the points of the figures. The space between these olive shaped figures is filled by a pointed square of chain stitches.
In the 1st and following rows you miss 5 stitches at the point where the figures meet, and continue to decrease in this manner until the space is filled up. The fringe is made in the dark colour, either directly on to the plain crochet, or after a few rows of open-work.
