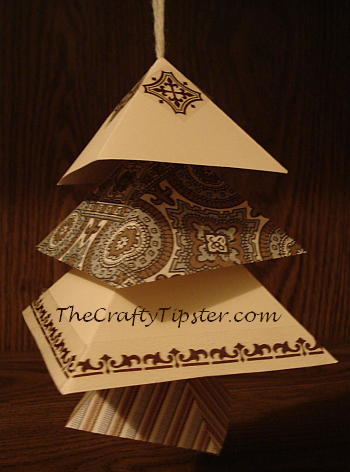
 I so enjoy making fun Christmas ornaments. But, I’m not a fan of fussy, mussy measuring and tracing. This project allows you to make your own pattern as you go along to create a floating Christmas tree ornament that can be as glitzy and glamorous or as simple as you would like.
For this one, I used some papers and stickers from a scrapbook page kit to create a somewhat tailored-looking tree.
You could also go Zen and doodle your way to a unique Christmas tree ornament like I did with my Zen Christmas tree ornament.
I’ll warn you now that this looks like a lot of instructions but they are quite straightforward.
Trust me, it’s one of those projects that takes far longer to explain than it does to make.
Step 1.
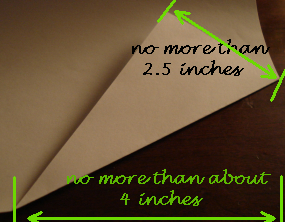
Start with a sheet of copy or notebook paper.Working with one of the corners, fold a tall and skinny triangle like the picture. If you make the triangle too big, you won’t be able to cut out one of the pattern pieces from a single sheet of copy paper or even scrapbook paper. The dimensions shown just fit on copy paper.
Cut out the triangle.
Step 2.
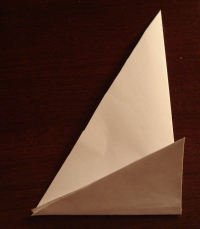
When you open you ‘triangle’, you may be surprised to see that you actually made a diamond.To square the bottom and have an isoceles triangle, fold up the bottom of your diamond as shown. Cut along the fold and now your diamond should look like a triangle or steeply peaked pyramid. Mine ended up being about 5 inches wide by 5 and 1/4 inches tall. If you make a triangle much larger than that, you may have trouble making the pattern piece.
Step 3.
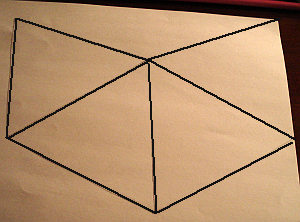
Take your triangle and line up the flat edge along the top side of a fresh sheet of paper. Trace the outline of the triangle onto the paper as shown being careful to line up all of the points.Depending upon the size and shape of your triangle, you may have to position yours further down the edge of your paper. It’s a good idea to test for placement or make a template of the entire pattern piece before using any special papers.
Step 4.
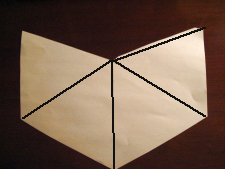
Before you cut out the first pattern piece for your stacking Christmas tree ornament, check out this picture. See the little tab on one of the inside edges? Cut your tab similarly but don’t worry about matching the size or width.The tab is optional. To make your tree look nice, you might need a little bit of glue too get the corners to seal tightly. Not using a tab works as well but tends to leave a little gap if you are not careful on your placement of the edges. Try both ways and use whatever works better for you.
My reason for doing it this way.
As you may have already encountered, pattern placement on the paper can be tricky. Yes, I could have created a PDF template for everyone, but this way you don’t need to print anything and can truly make this project your own.It also serves as a learning opportunity to teach children about isoceles triangles, the relationships between shapes and working with templates.
We’re going to be destroying the original triangle. To preserve fine papers and make more than one Christmas tree of the same size, you might want to trace this pattern piece, and the ones that follow, onto a piece of card-stock to create a more durable and lasting template.
Step 5.

Fold the pattern piece in half, making sure the points meet.Fold it in half again.
If you’re using card stock, you may have to fold one triangle at a time instead of folding it in half twice.
You should have something that is the same size as the original triangle but now it has the little tab on one edge.
Step 6.
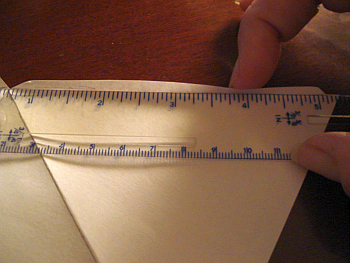
Open up the triangle and fold the little tab to follow the straight edge of the triangle.If you are straight-line challenged like I am, place a flat ruler along the line of the fold and hold it firmly along the drawn line. Slide a fingernail under the tab and run it along the edge of the ruler to score the paper.
Step 7.
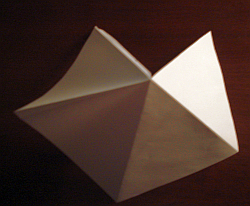
Carefully fold the tab along the score.On the same triangular section as the tab, reverse the fold you made earlier. You should end up with something that looks like the picture.
Step 8.
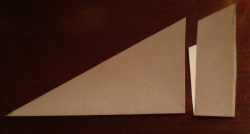
Find your original triangle template and fold it back in half. Cut off about 1/5 of the triangle – a half an inch or so if your triangle is similar to mine.Repeat the earlier steps to create the second pattern piece for your stacked Christmas tree ornament.
Step 9.
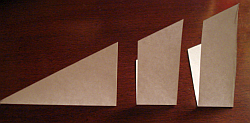
You may have guessed what comes next. Cut off another 1/5 of your triangle (just eyeball it, don’t worry about measuring) and repeat the earlier steps to create the third pattern piece for your stacked paper Christmas tree ornament.
Step 10.
Now the real fun begins! Decorating your tree!Add glitter, beads, drawings and other artistic bits to add some bling to your Christmas tree.
Remember, the smallest tier is used as the trunk of your Christmas tree, so you may want to do something different with that one.
To make it a truly unique and personal Christmas tree ornament that you make these with plain or single-colored paper and Zen doodle all over them, like I did.
Unless you are making your Christmas tree tiers out of card stock, be mindful of any weight you add. The structure of the tree may fail if the decorations cause the paper or card stock to tear from the added weight.
Step 11.
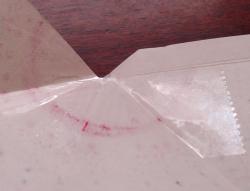
One thing you can do to reinforce your Christmas tree ornament is to use a little invisible tape along the top edge. Re-crease any folds that the tape goes over and try to not put tape on the tab.
Step 12.
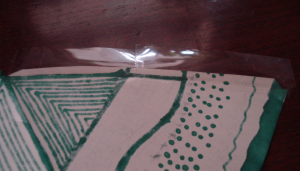
Putting together your tree ornament.I’ve tried glue stick, white school glue and tape and have found that tape works the best. The glue stick and school glue took too long to form the bond and the school glue made some of my doodles bleed.
Run a few pieces of tape along the back-side of the tab – cover the entire side, not just the tab. You can try to do it with one piece, but it’s far easier to use several and not worry about it tangling. Don’t worry about it going off the bottom of your tree, we can trim that later.
Step 13.
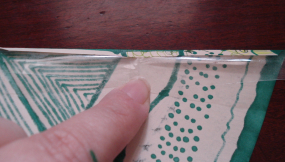
Fold back the tab with the tape. Put your finger onto the tape to hold the fold and bring the other side of the tree in line. The idea is to avoid letting the tape touch the far side until you have it in position.
Step 14.
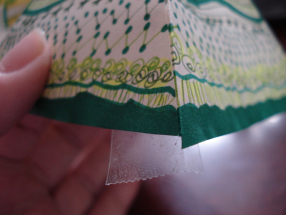
Once you close the pyramid/tree tier, you might want to pinch each of the folds.Trim any tape that is sticking out of the bottom and if need be, trim any corners that don’t meet, like mine did. (I did say I was straight-line challenged, didn’t I?) Don’t worry if your Christmas tree tiers are not perfectly straight – after all, they will be hanging and no will will notice if it doesn’t sit squarely on your table.
Run a little dab of glue along the edge with a toothpick to close any sides that may gap a bit.
Step 15.
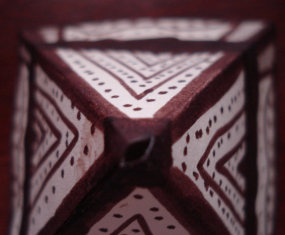
To assemble your tree tiers, you’ll need some ribbon or yarn. I used about a two foot-long piece of yarn for my Zen Christmas tree. Tie a double knot about an inch from the two ends to create a loop. (Curling ribbon will need to be weighted with a bell or some beads to hang straight and it is totally unforgiving if you want to move your knots. I would suggest that you don’t use it for this project.)Tie a knot with the two ends to create a loop or circle with the yarn.
Now for the slightly tricky part. Cut the very top of each tier off. Make a hole only as big as you’ll need to thread the yarn or ribbon through. If the knot can go through the hole, tie another knot in the same place to make the knot big enough to not slip through.
Step 16.
 Taking the smallest triangle first, thread the yarn up through the trunk of your tree. If you have a tiny crochet hook, it might make it easier to pull the yarn through the hole.Just eyeballing it, compare the bottom tier to the trunk and tie another knot in the yarn high enough up so that the trunk shows but not so high that the yarn shows. You can always slide the knot a little higher or lower to position the tiers more evenly.
Continue working this way until you put the top tier on but don’t make a knot above the last tier.
Enjoy your new Christmas tree!
Yeah I know it still looks like a lot of steps but, trust me it doesn’t take that long to make one of these. The hardest part is deciding what paper to use and how to decorate your paper Christmas Tree ornament.
Please let me know if you give this project a try and I’d love to see all of your beautiful trees.




Love the idea of using scrapbook paper and stickers. I have so many of both I feel like I’m drowning in half-used supplies. Planning a tree-making party with the kids for this weekend. Stoked!
Hope you had fun together. That’s the most important part of crafting. Thank you for including me in your holiday activities!