Like so many things with crochet, there’s often more than one way to do something. Sometimes there’s just not a simple and easy way. And, other times with a little logic, we can find ways to complete a task more easily and with far less counting. And, as a gal who loathes making giant foundation chains or otherwise fiddly things; I quickly learned some techniques for making a rectangular granny square are way fussier than they need to be.
The Great Blanket Project of 2019
The Wool Room knitting group that meets every Tuesday, thankfully lets this crocheter come and play too. When one of the ladies mentioned gaining access to someone’s old stash with a considerable amount of acrylic yarn, the group came up with the idea to make comfort blankets for a local charity that often rescues children from dangerous situations.
Yesterday was yarn day. It was a bit like being a kid in a candy store. Our big work tables were covered in a mountain of colorful yarns. Pretty much everyone took some yarn to make a comfort blanket with.
For me, it was yet another excuse to not finish the bag I’ve been working on. I jumped in, picked a bunch of coordinating colors and began making a giant granny square. I had a blast.
It All Began with a Question
I was asked about making a rectangular granny square by someone who wanted to do something a little different. Uhm, I had no idea. Hadn’t done one of those before, couldn’t be that hard? right?
While there, I tried to quickly come up with the answer to her question. I knew I needed a row of double crochet triplets, but how to make the corners. And, as usual, I began by overthinking it. The answer was such a simple one.
Hit up the old search engine and spotted this lovely vintage rectangular granny square afghan for sale at the 1stopretroshop.com (sadly, the site looks abandoned now) and thought, hmm, first row of doubles, grouped in threes? Interesting. But, do they really need to be grouped or split with a chain stitch in between?
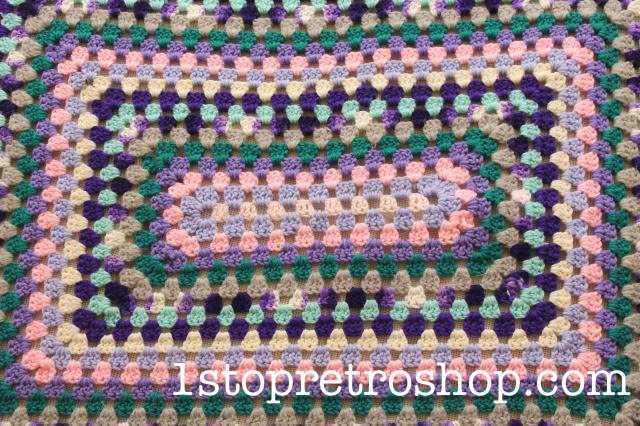
Seeing it done led to discovering just how easy it could be to make a granny square that’s not a square at all but a rectangle.
And, the best part is you can make it any size you want, with just a little math. (Trust me, it’s just a little math.)
How to Start a Rectangular Granny Square
First you’ll need to decide just how rectangular you want your rectangular granny square to be. How many double crochet triplets do you want to be in the first row. The longer you make this initial row, the narrower your piece will be.
In my case, I’ll be making 4 triplets in the first row.
Here’s the math I’ll need….
4 triplets will need 3 stitches each plus 4 stitches for the 2 ends.
4 X 3 + 4 = 16 stitches for my starting chain.
or
(number of desired triplets) X 3 + 4
So, 4 triplets requires 16 chains, 6 requires 22, 10 requires 34, etc.
Crocheting Afghans for Children
Before we get to stitching, let me share some of my strategies when making blankets for children; particularly when they are going to be more about comforting the child than just keeping them warm.
Yarn Choice
First off, always choose a washable yarn – wool and wool blends that can shrink or felt are a poor choice. Cotton can be nice, but acrylic yarns can stand up to almost anything. We have a few well-loved and much-laundered afghans my grandmother made that are over 40 years old. She primarily used Red Heart acrylic worsted weight yarns. And, trust me, they have been exposed to pretty much everything and anything and haven’t stained or come apart.
Over-Engineered for Strength
When it comes to switching from one yarn to another and weaving in ends, I usually focus on making it as pretty as possible first while trying my best to make it secure. But, when making something for use by children, particularly when it will likely be much-loved, I strive for durability first and pretty second. While I don’t typically go so far as to tie knots, I do add a few extra slip stitches and start new colors with a slip knot to ensure nothing unravels.
How to Make a Rectangular Granny Square
Stitches Needed
Chain Stitch
Double Crochet (US version that uses 1 loop over the hook)
Preferred Yarn
Any worsted weight, size 4, acrylic yarn.
Preferred Hook
Size H, 8 or 5mm; depending upon how your favorite hook company measures size.
Let’s Get Stitching
Foundation Row
Start by making a somewhat loose foundation chain with the required number of stitches based on the formula. (In my case, that’s 16.)
Turn and make your first double crochet in the 4th chain from the hook.
Michele’s Tip
Work in the back loop of the chains to make a neater edge where both sides match better.
Continue making double crochets across the foundation chain until you have one stitch left. Chain 2 and slip stitch into the last chain stitch (go into one of the side loops rather than the bottom loop). Slip stitch 3 more times into the foundation chain (bottom of dc stitches), cut yarn; insert hook into next stitch and pull end through.
Michele’s Tip
I’m adding those extra slip stitches to add strength and prevent the ends from unraveling. Again, this is not a “traditional” method, a crochet expert might spot the ‘wrongness’ of it, but no one else is going to. Position the cut yarn so that it drapes over the 3rd and 4th double crochets or the chain one gap on later rounds. That way you can work one group of 3 double crochet stitches before weaving the end in completely.
Switch colors.
First Round:
A. With new color, make a slip knot. In the opposite end to where you finished the foundation row, insert hook into chain 3 loop and make a slip stitch. Chain 3, make 2 double crochets, chain 3. Make 3 double crochets, chain 3. Make 3 double crochets, chain 1. First 2 corners made.
Michele’s Tip
I’m making a slip knot with the new yarn to add strength and ensure the end doesn’t come out. Traditional methods wouldn’t add new yarn this way.
B. Skip 3 of the double crochet stitches and work 3 dc into the gap between the 3rd and 4th double crochets of the foundation row. Chain 1.
C. Skip 3 of the double crochet stitches and work 3dc into the gap between the 6th and 7th double crochets of the foundation row. Chain 1.
D. Continue working across the double crochets of the foundation row until you reach the chain 4 loop you created at the end of the foundation row.
E. Make 3 double crochets into the chain 2 loop. Chain 3 for the first corner. Make 3 more double crochets in the same chain 2 loop. Chain 3 for the second corner. Make 3 more double crochets in the chain 2 loop. Chain 1.
F. Skip 3 double crochets and make 3 double crochets between the 3rd and 4th double crochets of the foundation row. (You should be working between the same 2 stitches as you did on the opposite side.) Chain 1.
G. Skip 3 double crochets, 3dc, ch 1 …. repeat as many times as needed.
F. When you have worked your way around, make one final double crochet triplet between the 3rd-and 4th last double crochets, chain 1 and slip stitch into the chain 3 that made the first double crochet in this round. Slip stitch into 3 more stitches and cut the yarn, leaving a decent-sized tail to weave in.
Michele’s Tip
When you make the slip stitch into the chain 3, make sure you grab 2 loops; otherwise you might inadvertently create a big, unsightly loop.
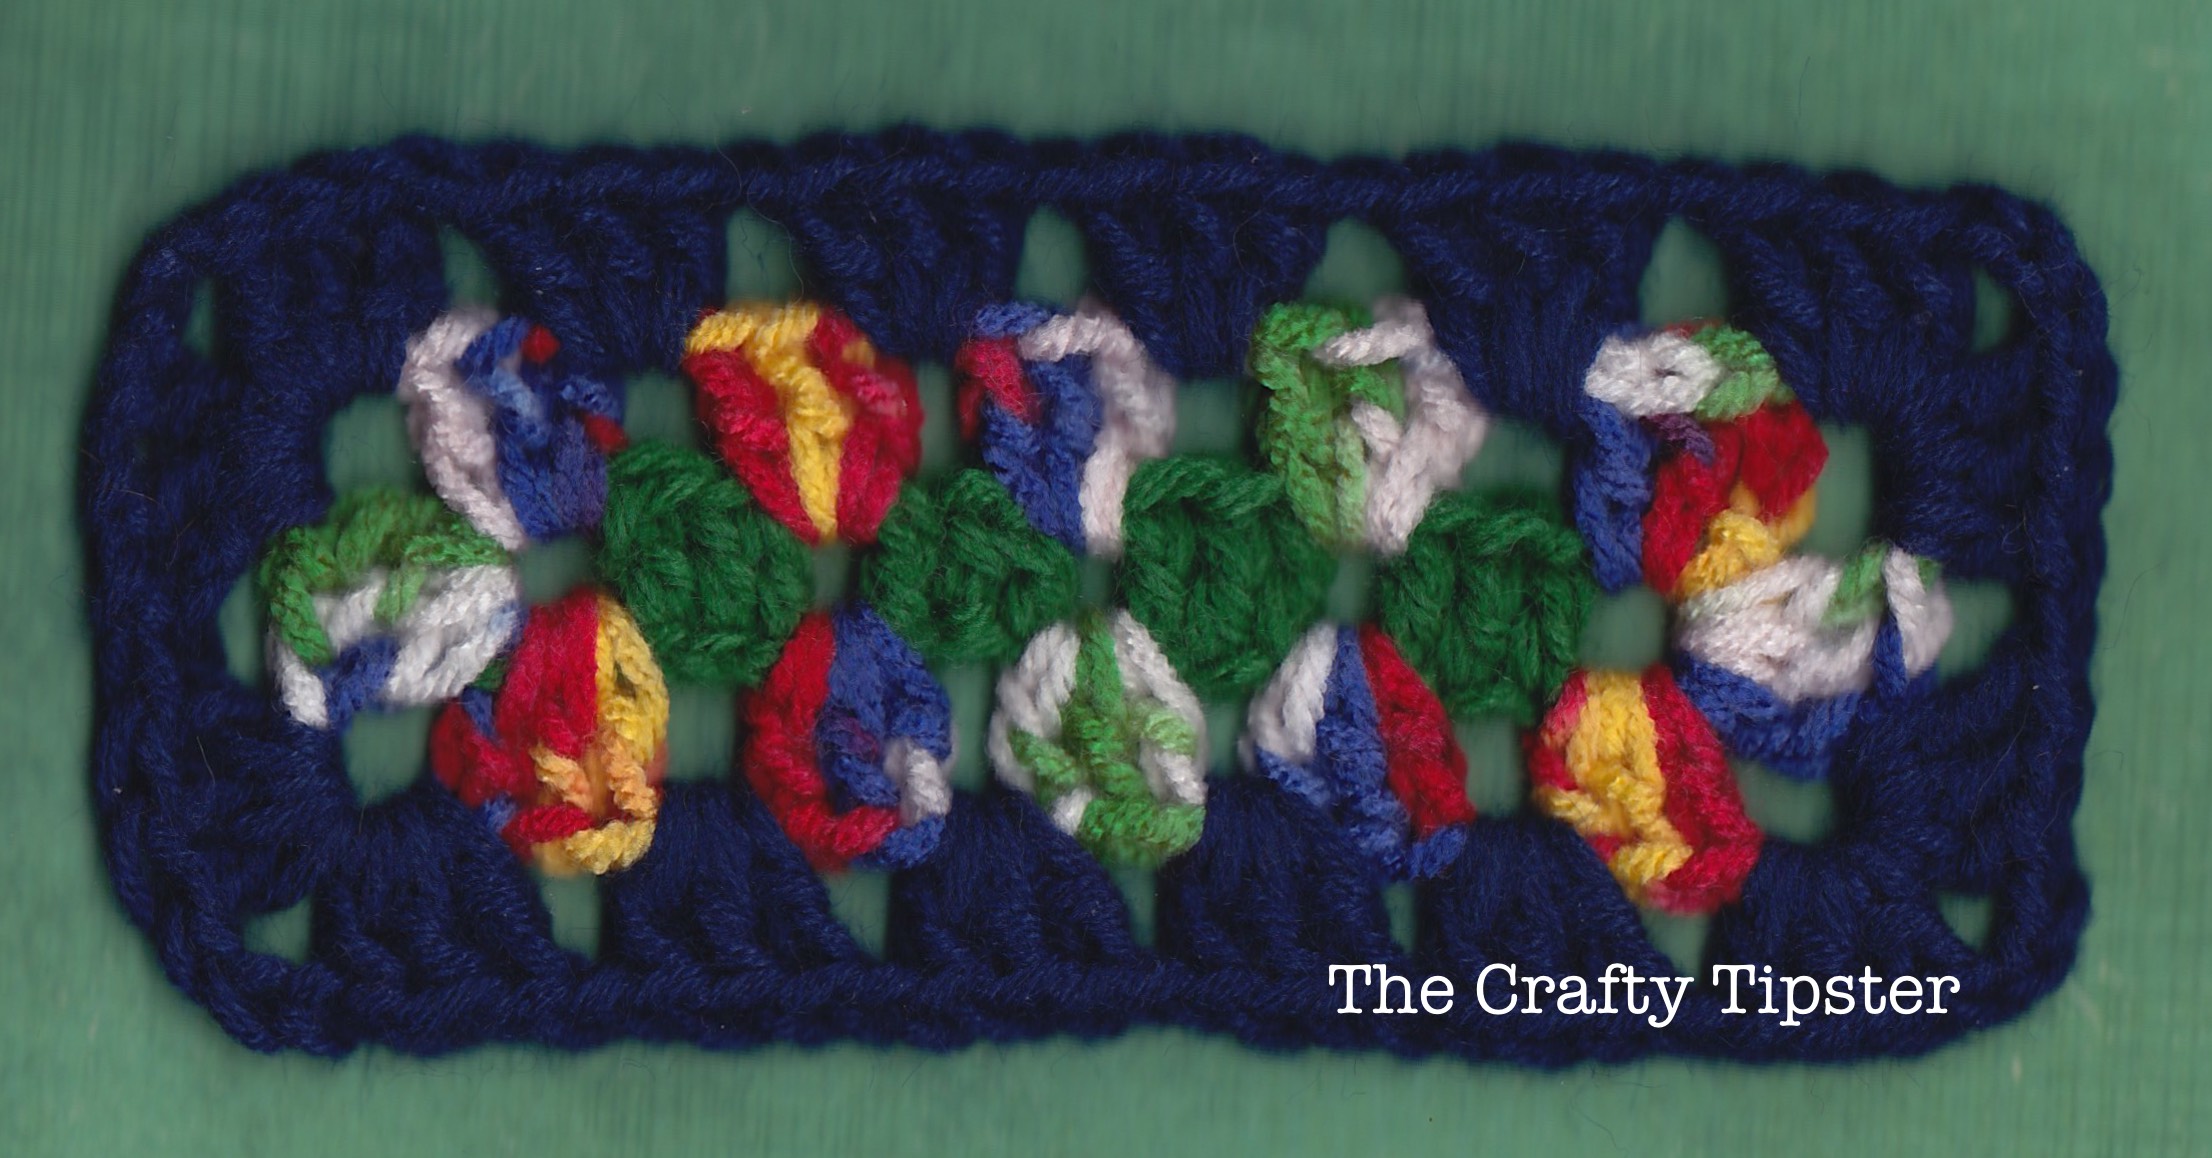
So, at this point, you should have something that looks like this:

Second Round:
A. With new yarn, make a slip knot. Insert hook into one of the corner chain three loops and make a slip stitch. Work the following into the same corner loop: Chain 3, make 2 double crochet, chain 3. Make 3 double crochet, chain 1.
B. In next corner, make 3 double crochet, chain 3, 3 double crochet, chain 1.
C. In each chain 1 space, work 3 double crochet, chain 1.
D. In next corner, make 3 double crochet, chain 3, 3 double crochet, chain 1.
E. In each chain 1 space, work 3 double crochet, chain 1.
F. Slip stitch into the chain 3 that made the first double crochet of this round. Slip stitch into the next 2 stitches to end off. Leave a tail to sew in.
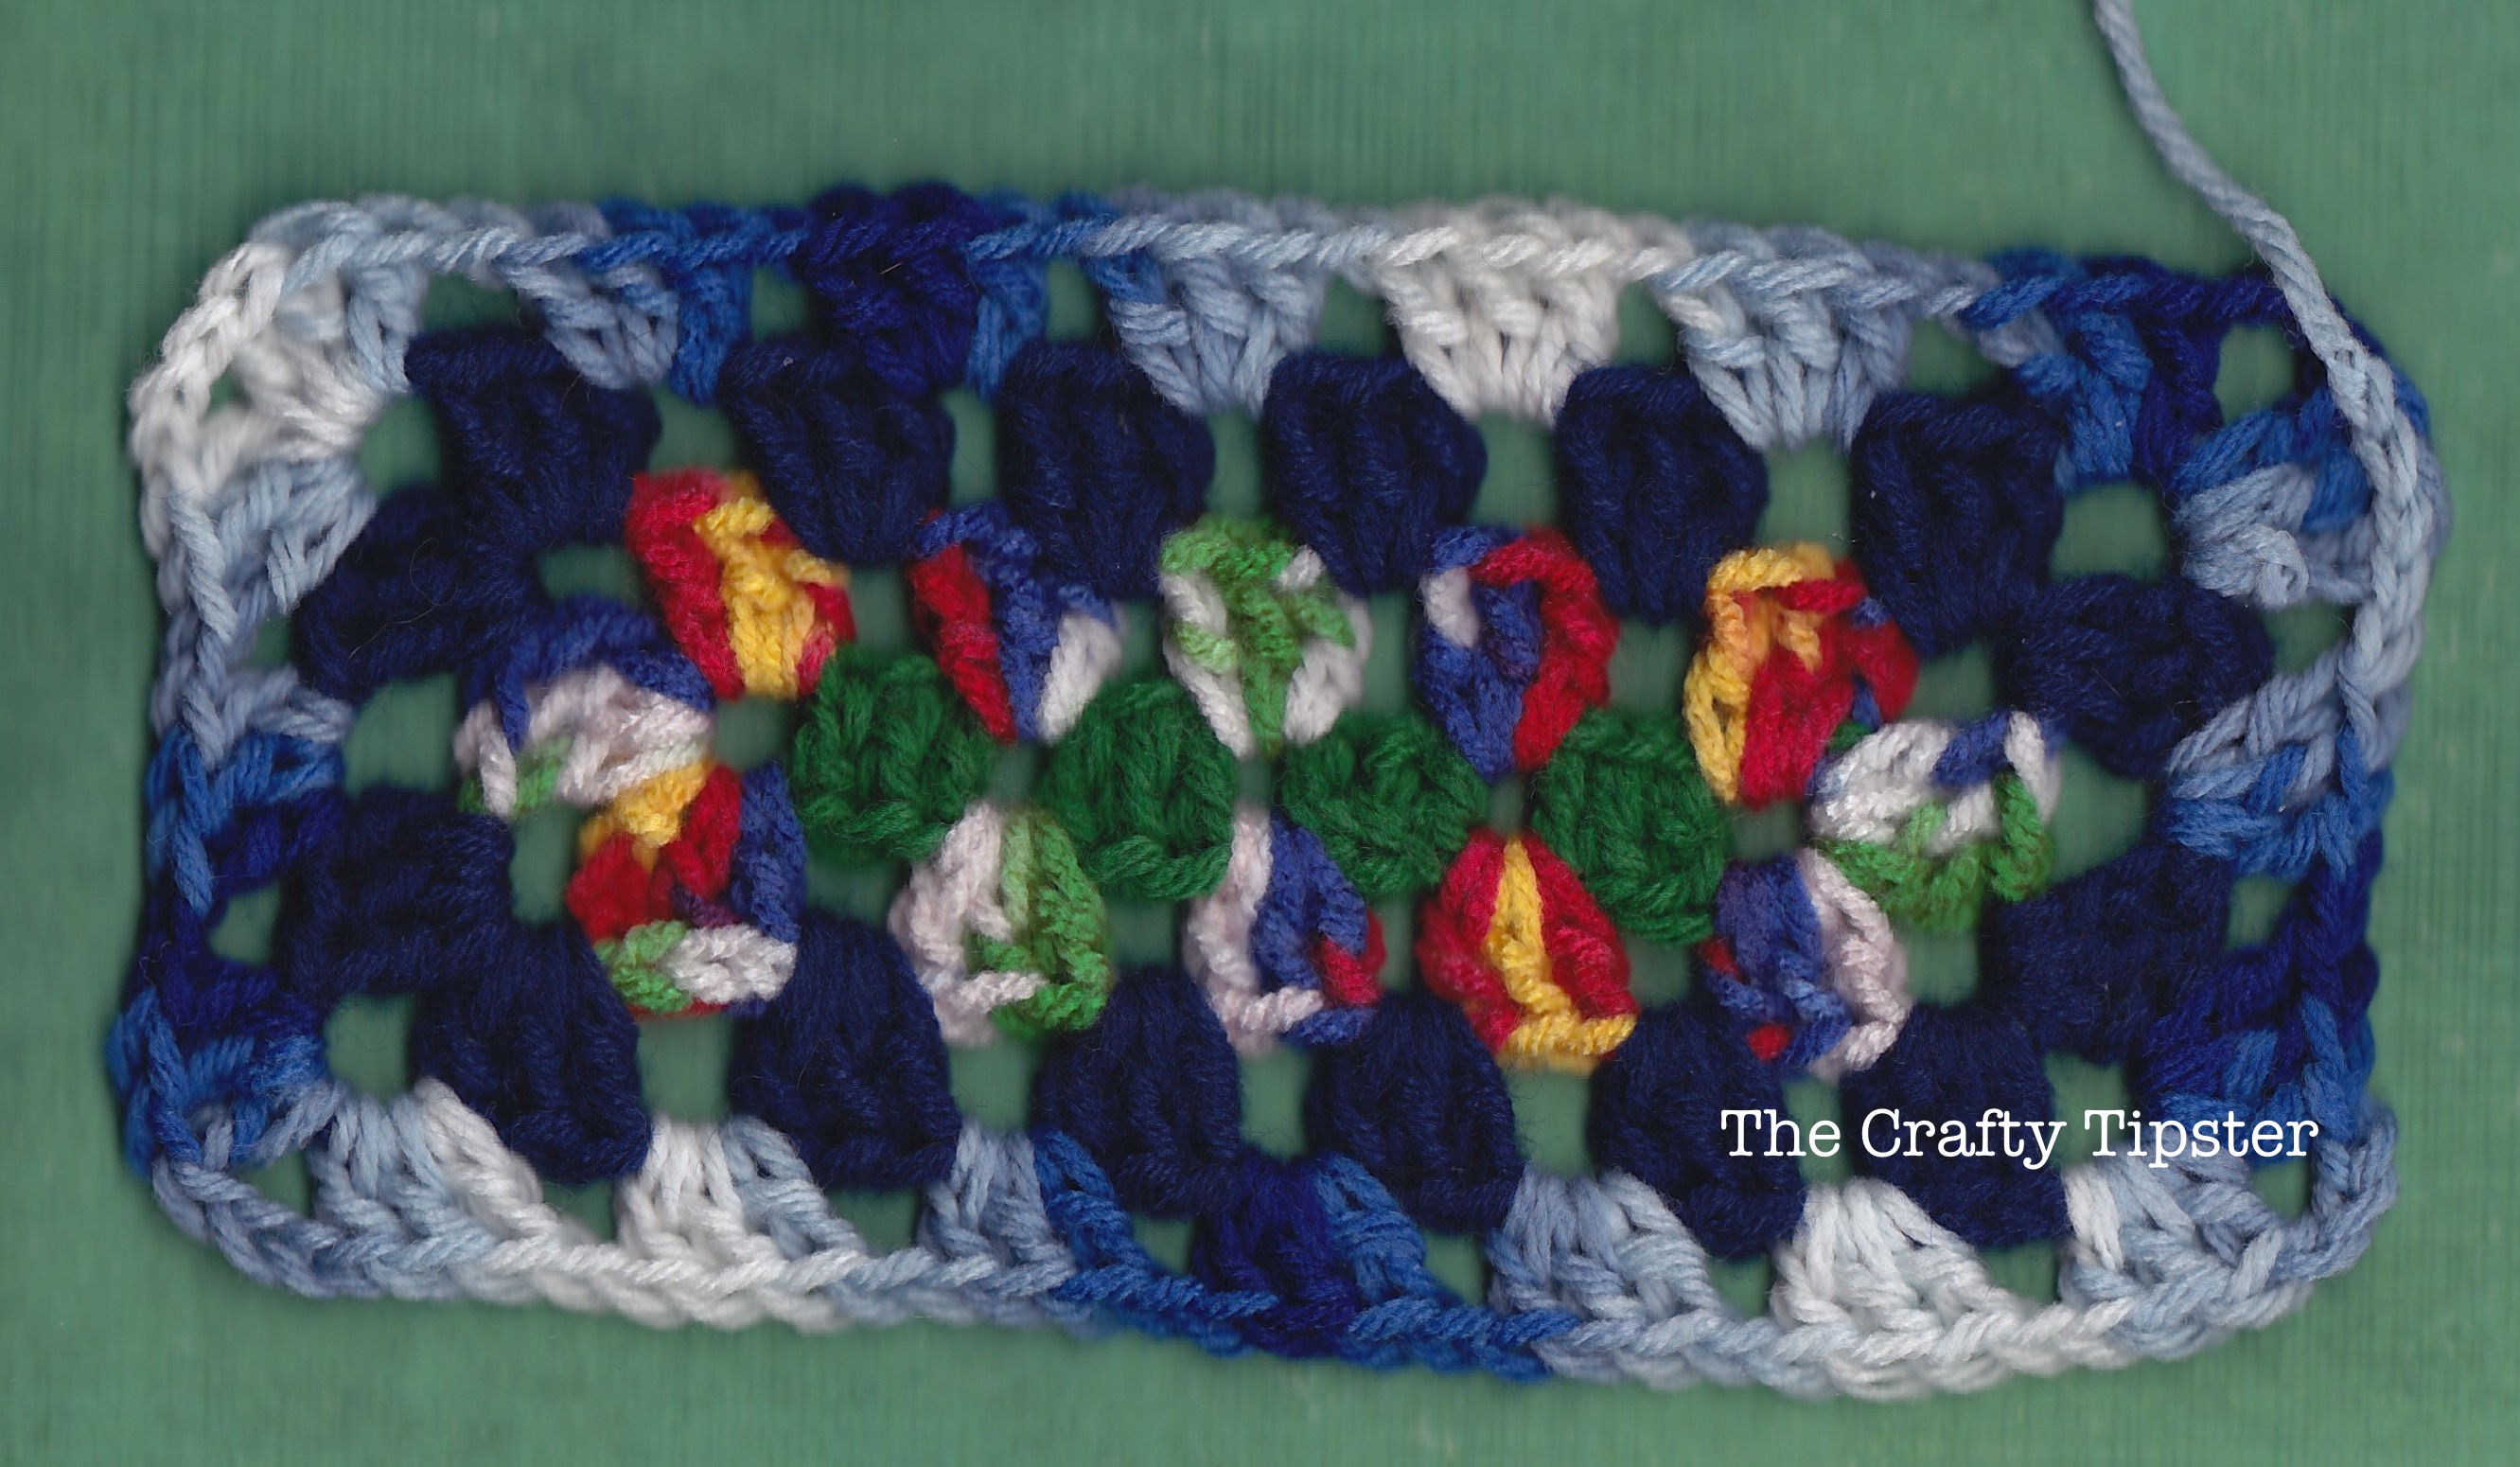
All Additional Rounds:
A. To help keep your rectangular granny square more square and flat, flip your piece over and work on the opposite side each round. It’s also a good idea to rotate which corner you start each round from.
B. The only thing that will be different after the Second Round is you will start adding double crochet triplets on the sides. Otherwise, you’ll be working your rectangular granny square the same as you would any traditional granny square.
I hope you found this tutorial on how to make a rectangular granny square useful. If you have any comments or questions, please feel free to share them below.


So if doing rectangle granny square blanket do you turn work over or just turn to work along other side
In general, you work in ‘the round’ – moving across one side and going around the corner then across the end around the next corner and up the other side. Turning your blanket over between rows isn’t 100% necessary but it does help keep it square and helps to hide where your rows begin and end.
It seems that, however rectangular the first rounds, the larger the blanket grows the more square it becomes. That is, the Length:Width RATIO is not constant as the blanket grows.
I’m trying to make a 6ftx3ft granny rectangular blanket and I can’t figure out how many chains to start with.
Can someone assist?
Thank you!
Since you want a specific size and because we all use different materials and get slightly different results size-wise – there’s not a boom here’s the answer sort of answer. And, yes, math is involved but it’s fairly straightforward.
I would make a sample with a few rows. I would measure the height of each row. Keeping the math simple for my explanation, let’s say your rows are 1 inch tall. So that means every row adds 2 inches (both sides). So, taking the shorter side of 3 feet, or 36 inches, we would need 18 rows. But, we can’t forget the initial row – so since 18 is an even number, you’ll either need to go an inch bigger or smaller.
OK, so 18 rows total, would be 9 rounds since we make two rows (each side) at a time.
With the longer side, it’s a bit trickier because of the spaces created by the chains but, hopefully, they’re about the same width as they are high. Again, keeping the math simple for this explanation, you’ll need 36 rows to get to 6 feet (72 divided by 2).
Hopefully, you’re still with me.
So, we know we need 18 rows to get 36 inches wide and 36 rows to achieve 72 inches tall. But, since we’re working in the round, we have a little more math to do since we are starting from the middle.
The starting row will need to be 36 minus 18 clusters wide or 18 clusters.
So, it’s shortest length divided by stitch height divided by 2 AND longest side divided by stitch width divided by 2.
Then subtract the second result from the first to get the number of clusters needed.
At least I’m hoping that’s right. Please double check my math on paper before trying it with yarn.
You are an angel (how appropriate for the Season!) to explain this so carefully to me. This weekend I will have a whole day to work on the details. Many, many thanks!!
Awe, you are most welcome. Would love to see how your project turned out.