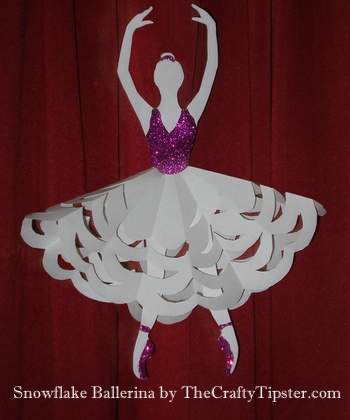
 The curtain is ready to rise on a trio of lovely ladies. Our version of the popular snowflake ballerinas blend two great ideas – snowflake ballerinas originally designed by a Russian blogger named Lelia (sadly her site is no longer online) and the work of Julia Monroe on AllSparkledUp.com.
Snowflake Ballerina Inspiration
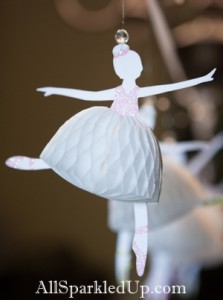 What I love about Julie’s paper ballerinas is the addition of a bit of colored glitter to create ballet shoes, a top and a bit of bling in the ballerina’s hair. She used a honeycomb garland of some kind to create the skirts but I think the snowflake ballerinas are a bit more fun and families are more likely to have plain paper on hand rather than the cool honeycomb stuff Julie used.
Hope Julie doesn’t mind that I watermarked her photo. I wanted to make sure folks give her credit for the glitter idea as well as the honeycomb stuff idea.
Ballerina Templates
Not wanting to run afoul of anyone’s copyrights, I started my snowflake ballerina project by creating a trio of ballerina templates. I tried making them with fancy finger positions but that involved too much fancy cutting for such an otherwise simple project.
The skirts in my snowflake ballerina templates are designed to help hold up and spread out the cut snowflakes. If you want to use my templates for other projects, you may need to remove or otherwise alter the skirts. Also, depending upon how your snowflakes turn out, sometimes trimming the skirts a bit more makes it look better.
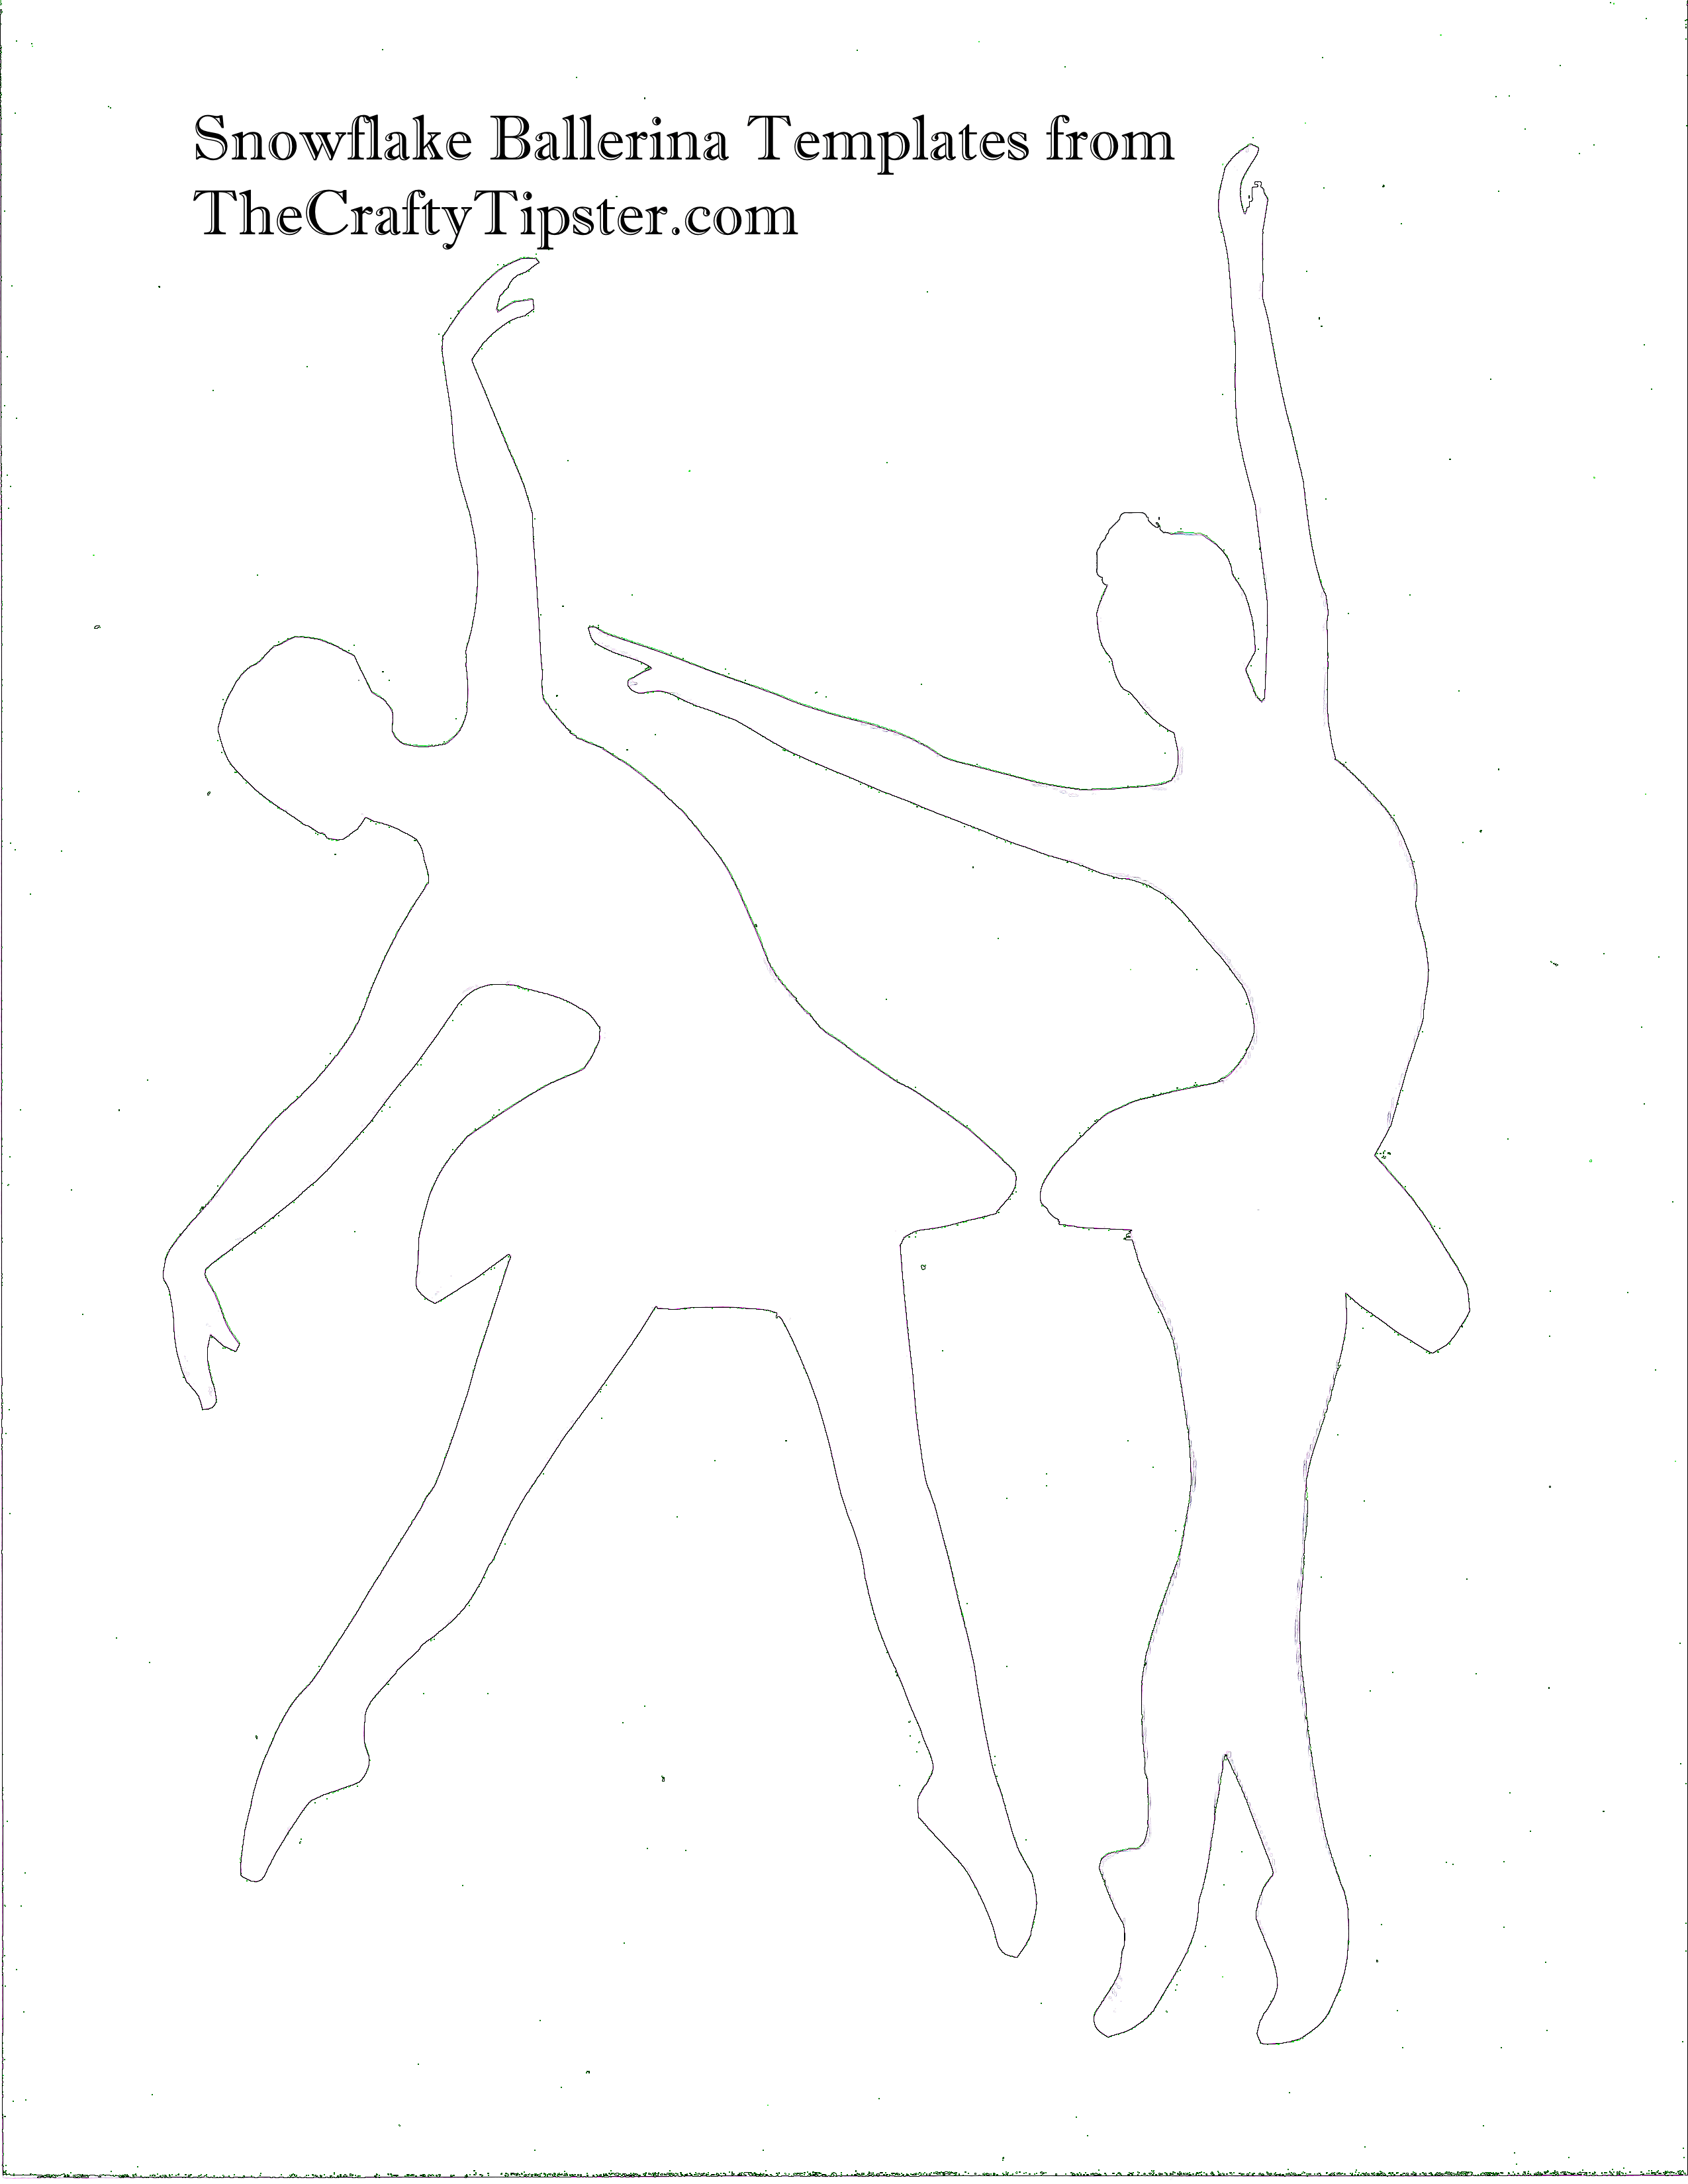
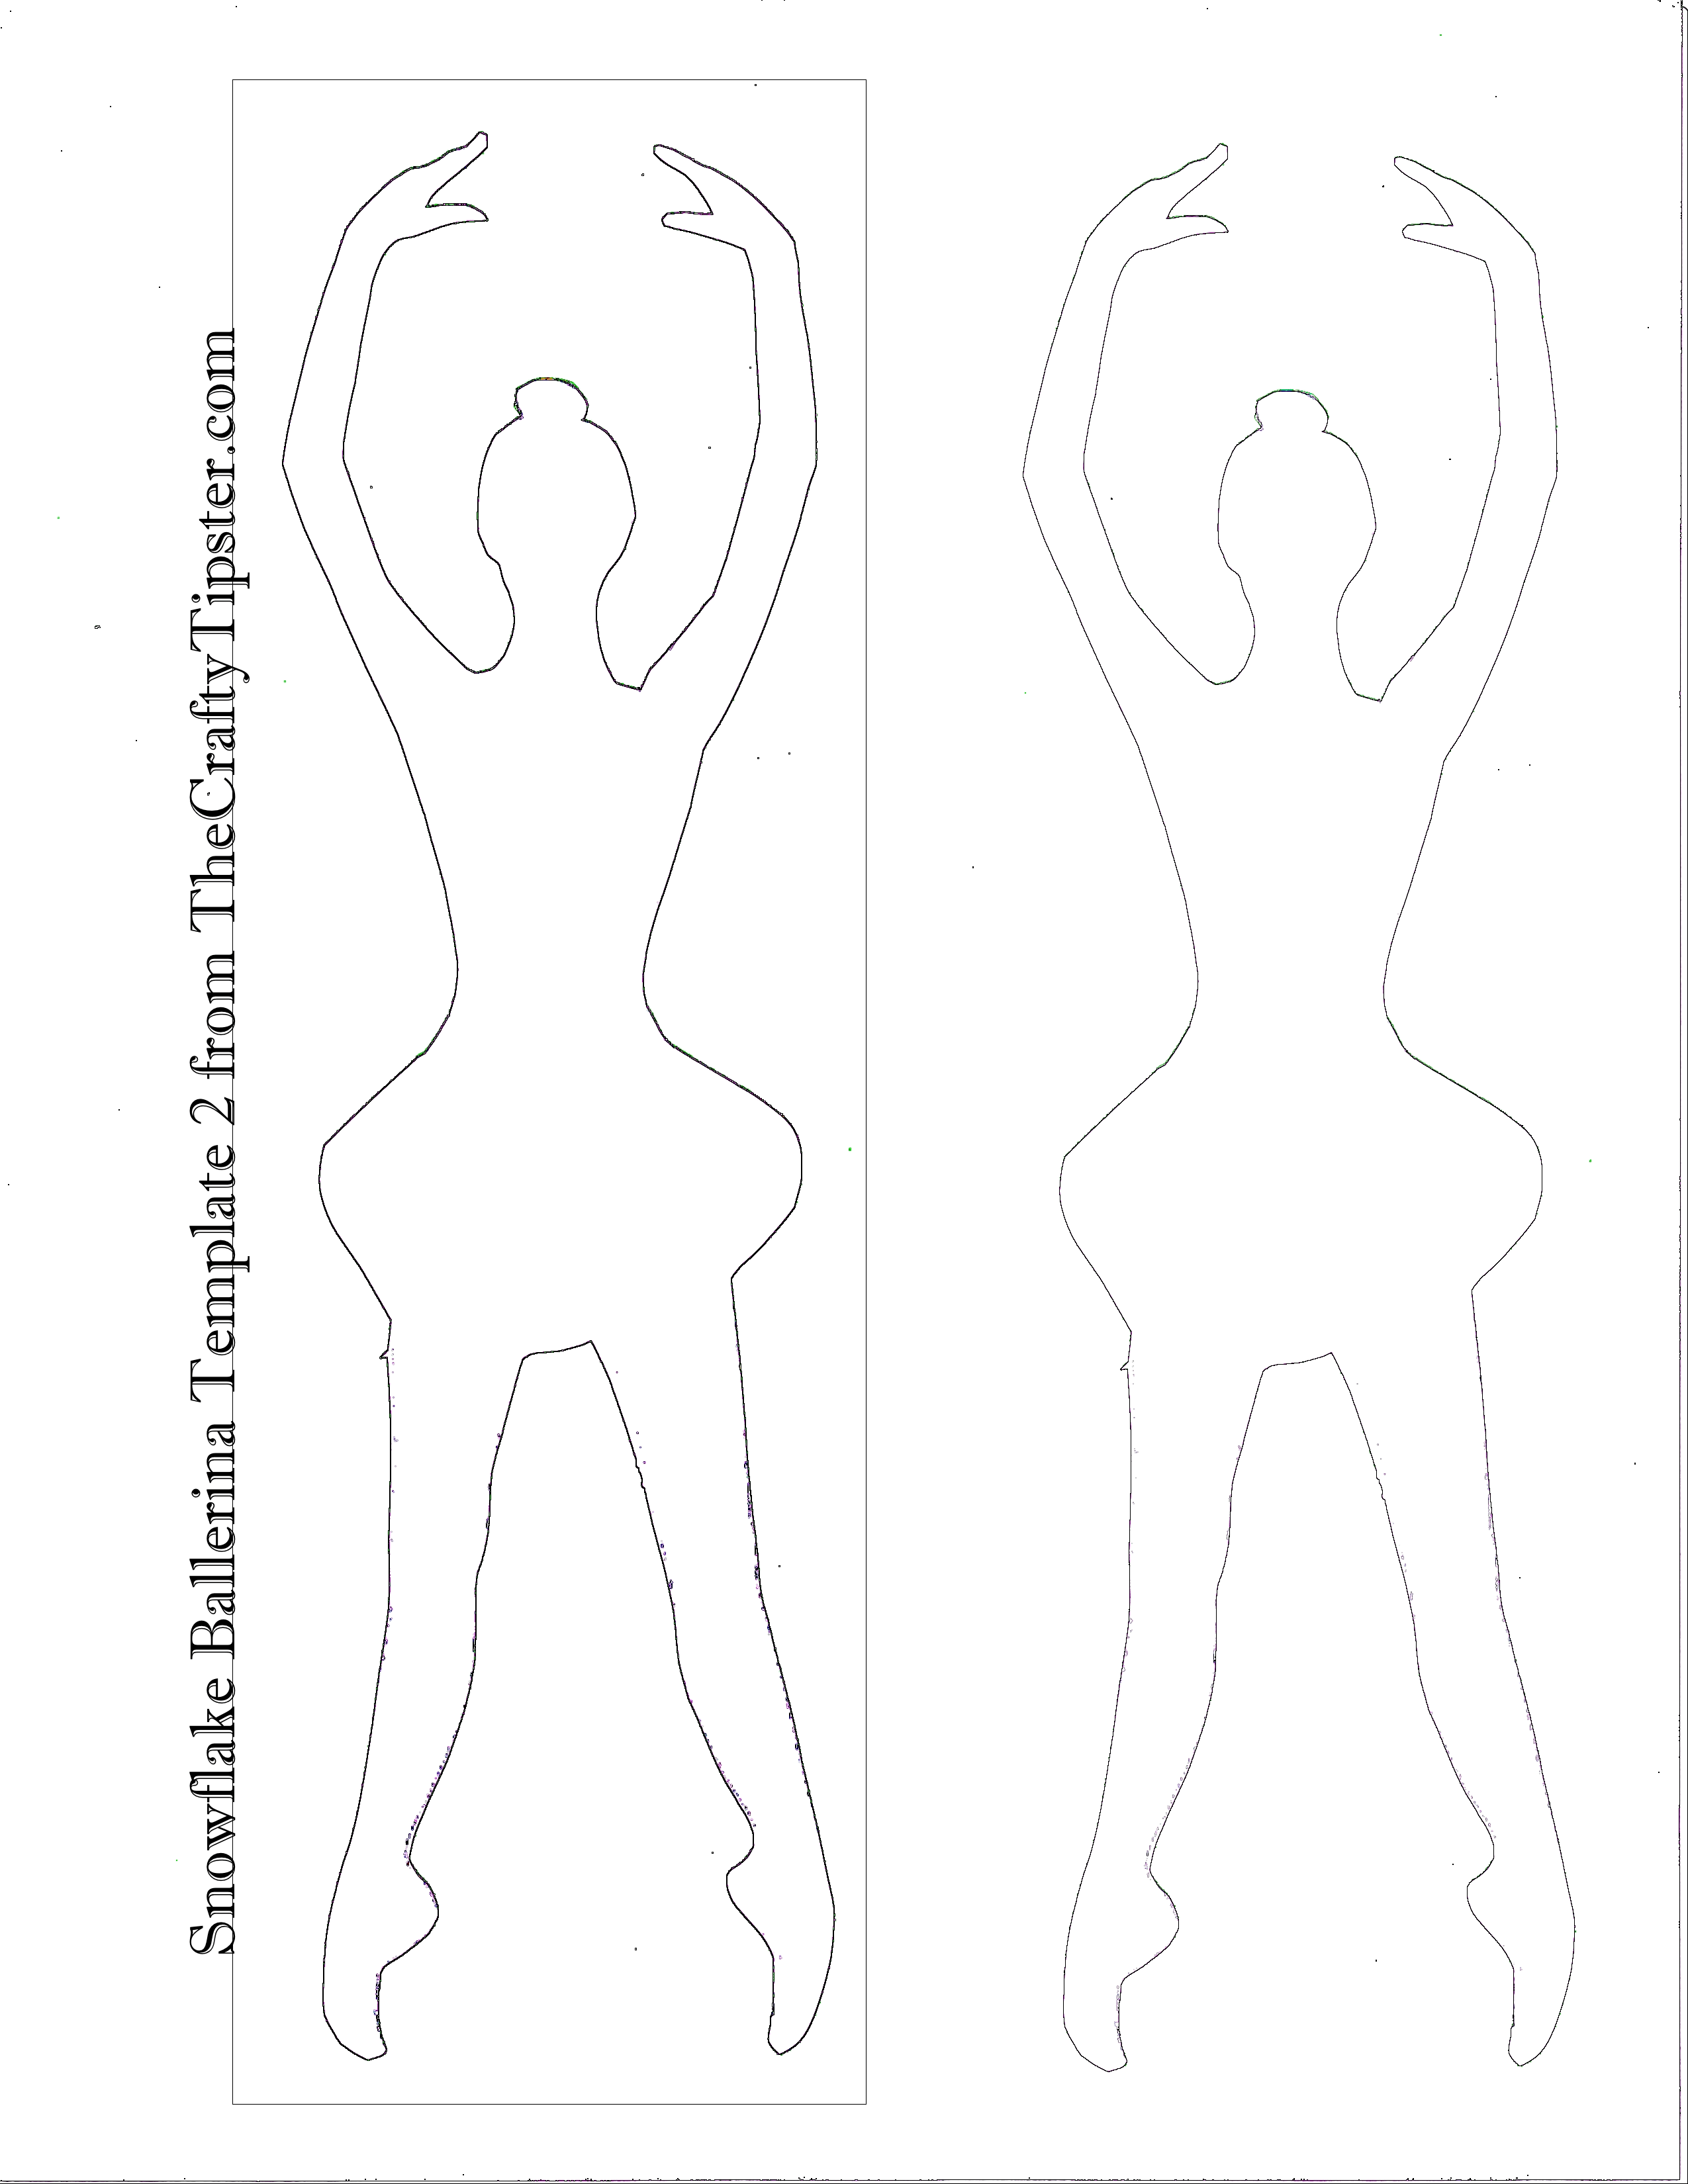 Just click on the templates to see the full-sized versions. I tried to make the lines somewhat light so that if you miss any during cutting they won’t be as noticeable. The files are a simple .gif to save bandwidth and ensure everyone’s prints the same way.
I would recommend printing the ballerina templates onto card stock. Using copy/standard 20 pound paper does work but the ballerinas may not hold up as well. It will also hold up better to being glued and glittered.
Once you have printed and cut out your ballerina templates, break out the glue and glitter to add the blouse, ballerina slippers and hair band. If you want to skip this step, your ballerinas might look a little better if you trim off the two little buns on top of the templates which have them.
Snowflake Cutting & Folding
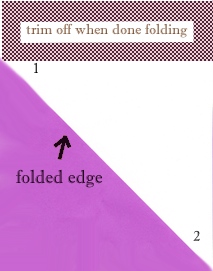 I generally use a sheet of copy paper and fold one corner over to the other side of the paper to create a folded triangle with a bit of extra at the top. Fold corner 2 to corner 1 and then fold it a third time the same way – putting tip to tip. You’ll end up with a snowflake with four points.
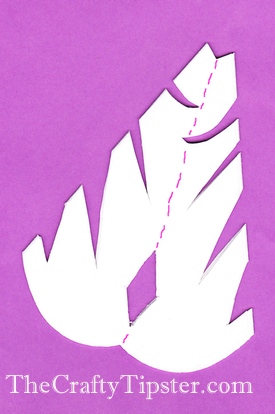
For the snowflake ballerinas, I like folding it one more time and to create 8 points. The layers of paper will be hard to cut through. So, I generally make a curved bottom to create a skirt-like look and make one or two cuts to one side of the folded edges. Then, I open up that last fold and cut the snowflake in the typical manner. Hopefully, that and the pictures will show you what I mean.
After you open up your snowflake, gently bend (not fold) your ballerina and slide her legs and skirt through the center of the snowflake. You’ll need an opening about an inch or so wide. Don’t worry if it’s too small, just refold your snowflake and cut the opening a little bigger.
Snowflake Ballerinas
And, now that the curtain has fully risen and the orchestra is playing Dance of the Sugarplum Fairies, here are the remaining two ballerina designs. I left one without glitter for comparison.

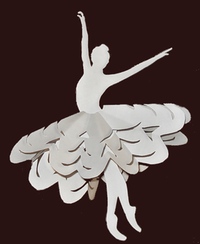
What do you think? Better with the glitter or without?
Glitter, The Finer, The Better
With this project, I quickly learned; the finer the glitter, the prettier the finished project. Our prettiest results came from using ultra fine glitter that was like dust.
We tried using stuff from a giant bottle of cheap glitter that we had thought was a bargain at the 100 pennies store. It looked awful; it laid in clumps and chunks and the toe shoes came out looking like boots.
This project turns out best with a glitter that’s almost like powder. The stuff we used came in little packets; again from the 100 pennies store. I think it was sold for nail decoration, rather than crafting. It was surprising how far it went, considering how small the containers were.
If you don’t have the time to hunt down fine glitter, we found this glitter pack on Amazon – it even has a pink that almost matches what we used; and it’s got a pretty purple one too.
Let’s face it, most crafters love the shimmery, sparkly goodness that can only come from glitter. But, alas, no one loves (OK, maybe I do) seeing their carpets and floors sparkle once the crafting is over.
Do your glitter gluing over a clean sheet of paper. If you’re careful, you can scoop up the excess and use it on another ballerina or put it back in the container. At the very least, working over a piece of paper will help prevent your home, your children and even the family pets from being as sparkly as your snowflake ballerinas.


Love, love love the glitter idea!
Oh this is so much cooler than plain snowflakes! Can’t wait to do this with my nieces.