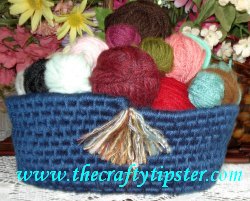
 This woven basket tutorial is very easy to use but does require patience and quite a bit of time. Attention to detail will make a prettier basket but this project could be made by children you would trust with a needle and thread.
Making woven baskets from coils of rope, yarn and fabric has been around for centuries and is a great way to introduce children to the art of coiled basket making. Best of all, this woven basket tutorial creates something that they can use themselves or give as a gift. (Adults might find this project fun too. I know I did.)
Materials Needed
length of rope
yarn
sharp embroidery needle (only required for the initial round of the woven basket tutorial)
dull embroidery needle (optional)
pliers (optional)
decoration (optional)
I would recommend that you budget a skein of 4-ply acrylic yarn for each woven basket. You won’t need all of it but my basket used 75-80% of a Caron’s Simply Soft skein.
You will need a fairly long length of rope for this project. I thought I would have rope left over and instead had to make a smaller basket than I had intended. (sorry, I didn’t measure it before I made my basket.)
My basket is oval in shape but this project could be easily adapted to most shapes. The only tricky part will be in the beginning to get the general shape started.
How to Make a Woven Basket
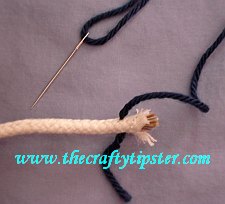 To start weaving your basket, you will need to “tie” the yarn to the rope.
Thread your yarn through the sharp embroidery needle and pull the yarn through the entire thickness of the rope.
Smaller children may need assistance with this step as I had to use a pliers to pull the needle through my rope.
If using a pliers, grab the needle firmly as far down the shank as possible. If you grab too close to the tip and yank, you might accidentally break the needle.
At this point you will no longer need a “sharp” embroidery needle and you can switch to a “dull” embroidery needle to finish your rope coil basket.
Lay the yarn tail along the rope pointing towards the long end of the rope. Wrap the yarn tightly around the rope and tail until you have enough rope covered to fold the covered rope to begin shaping your basket.
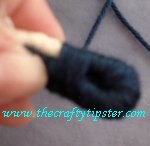 At this point, you should have bare rope from the point you stitched through it and a few inches of covered rope. Fold the rope where your next wrap will cover the wrapped rope about 1 inch from where you inserted your embroidery needle. Tightly wrap the yarn around as shown.
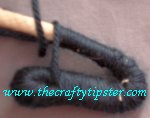 Wrap yarn around both segments of rope and cover the end of the rope. You will need to make these wraps as tight as possible to create a flat and tidy start of your basket.
Once you have wrapped the yarn past the end of the rope, fold the rope and start the spiral that shapes the basket. You should be wrapping around only one thickness of rope. When you reach the place indicated in the image to the right, make one of the wraps over the current row as well as the row below. (This connects the two tows together and forms the woven-look of your basket.)
Continue wrapping and coiling your yarn and rope. Make five wraps and then make the long/connecting wrap. Continue working in a spiral making five wraps for every long/connecting wrap.
Crafting Tips to make a neater basket
Always wrap in the same direction around the rope. This is particularly important to keep your long/connecting stitches even.
Make your wraps as close together as possible. If you are using a light-colored rope and a dark-colored thread like I did, every miss is noticeable.
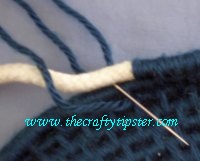 When making the long/connecting wrap, I noticed that it often created a gap that allowed the rope underneath to show.
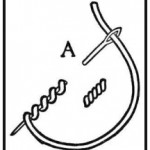
By inserting the needle through the loop as you make the long stitch, it will pull the stitch tighter and fill the slight gap created by the longer stitch. Hopefully, the image makes it more clear.
Also, try never to change threads right at the connecting stitch. It creates a bunch of yarn all in one place and will make your wrapped rope lumpy.
Adding new threads
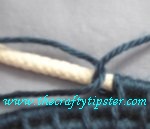 Knots will make your woven basket lumpy. The good news is no knots makes it easier to add new thread.
After making a connecting stitch and one or two regular wraps, wrap a new piece of yarn around your working thread close to the rope. Make the next wrap around both the tail and the long end of the new yarn. Make a second wrap around both and then work back to the place where the new yarn wrapped around the old, the place just about the “p” in the image shown. Cover the loop of the new thread and try to create an even transition. Better to double wrap a bit than have your new thread work loose or to leave rope uncovered. (You’ll get better at this as you go along.)
Your yarn wraps will lie flatter if you don’t have the tail and new end directly next to each other as you wrap yarn over them.
I tried to always make at least one set of 5 wraps, one connecting stitch and the first wrap of a second 5-wrap set over the new yarn.
It will surprise you how fast the last bit of yarn on the needle disappears. I typically added new thread when I had around 10-12 inches of yarn left on the old thread.
Once you have secured the new strand of yarn, simply take the old yarn out of the needle and put the new in. When making wraps and connecting stitches with the new yarn, make them over the old one to “knot” the old yarn. Trim any ends that might have escaped your wraps.
Yarn Lengths
I made the obvious assumption that the longer piece of yarn I could work with, the easier it would be to make my basket. That logic is partially correct.
When you start your basket, use an extra long thread – better to fuss with a tangling, long thread than try to add a new one before you even get your coils going.
As a rule, I used a length of yarn equal to the length of my outstretched arms – around a yard/meter or so. This is something that you will have to use a little trial and error to find the length that works best for you. It actually takes less time to add a new length of yarn than it does to pull a bunch of yarn through the wrap and prevent tangles.
Shaping your basket
Once you have created a woven piece as large as you would like the base of your basket to be, position the uncovered rope at an angle to what you have already covered. The rope will want to settle back down next to the previous row rather than slightly on top of it so you will have to pull the wraps tightly and hold the placement of the rope carefully.
Depending on the shape you are going for, you will make the angle of your rope more or less open. Within one or two rows, you should transition to working with the new rope on top of the old row rather than next to it like you did for the base of your basket.
The only tricky thing from this point on is to keep the sides of your basket fairly straight. It is easy to allow the rope to shift slightly and cause a row to be tighter or looser than the one below.
Finishing your woven yarn basket
My rope was quite old and had been made using some colorful upholstery threads. I incorporated those threads into the design of my basket by ending my wraps in such a way as to position the threads like you would a bow or other decoration.
Most of the other instructions I found online for making a coiled basket like this just had the wraps end at the end of the rope. I didn’t really like the blunt end that created.
What I suggest is that you gently shave or cut the end of the rope into a wedge shape where the rope tapers slowly to a smaller thickness.
Additionally, you could add a crochet flower or other decoration to cover the end of your basket.
The hardest part of making a woven yarn basket is figuring out what you are going to use it for. ENJOY!!!
This technique also would work well for drink coasters. It would probably take the same amount of time to make a set of 4 or 5 nice-sized coasters as it does to make a basket.
April 5, 2010
Hi Everyone!
Dorris has kindly agreed to let me share her wonderful baskets that she has made using these instructions. I am so excited to see that she took my woven basket tutorial and has come up with so very many clever variations.
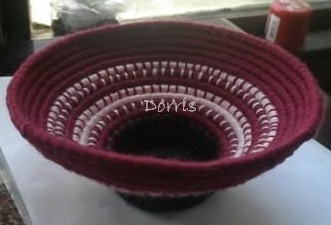
|
This was Dorris’s first attempt making one of these woven baskets. She told me that her friends and family are claiming her creations as fast as she makes them. I think she said a daughter has this basket. |
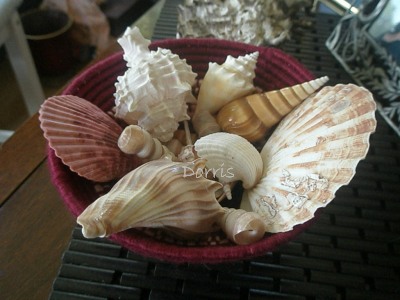
|
And here’s a lovely picture of her first basket being used. I love how the yarn color picks up the beauty of the seashells. |
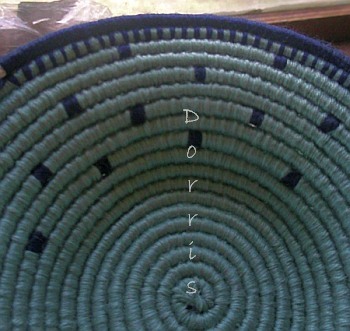 Three great examples of creating patterns and using contrasting colors. I love the vase shape which shows how this woven basket technique makes it fairly easy to create a huge variety of shapes and sizes. The vase was only her third basket! |
|
Dorris asked me if I had any ideas for working rows where the color changes completely, i.e. the wrap connecting to the previous row doesn’t show. I made the suggestion to work the new row with both the old and new colors on the new row where the row is worked with the new color and the old color is brought along and hidden until the connecting wraps. The connecting wraps are made with the old color but the new color is wrapped over the join so that the old color doesn’t show on the new row and only shows on the previous row. She reports it works great and doesn’t even make for lumps at the connections!
Anyone else care to share their creations made from my woven basket tutorial?
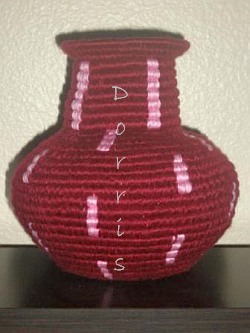
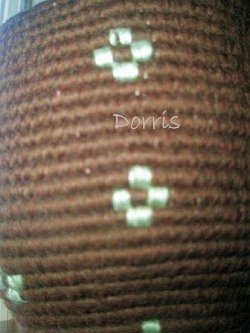

Thank you for the great instructions. I have now finished two baskets and one vase. They look great and made even better gifts.
I do have a question however, I would love to be able to work different designs into these projects, using different colors. I don’t know how to do that without showing the attachment to the prev. row with the new color. Can anybody help me with this?
Thank you.
Dorris
Hi Dorris,
Thank you so much for letting me know that you found my instructions helpful. I had so much fun making my basket, sounds like you did too!
I guess you could attach the rows together with monofilament but I would think that would make things look off. Perhaps you could work with the old color and the new one at the same time. Use the old color to attach the rows and wrap the new color over-top to hide the old color on the newest row? It might make things a bit bumpy at the joins but it would make the design have separate rows that don’t bleed into each other.
Another option might be to make the joins using a number of stitches to create a houndstooth sort of design?
Gosh, hope that’s what you asked and it makes sense.
I would love to see what you’ve done. Do you have any pictures?
Hi Michele,
I have a couple of pics of my very first attempt, which I’m not all that happy with because of the color “bleeding”, but a friend of mine fell in love with it.
Unfortunately, my camera went on a trip to never-never land before I was finished with my second attempt, but I do have some pics I took while still working on it. I was mostly happy with that one, and it, too, went for a gift. The third one was a tall brown vase with green diamonds. The colors were at the request of one of my daughters and she was very happy with it. Unfortunately, she doesn’t have a camera either at the moment. The diamonds were not solid, though.
I would love to share the few pictures I do have, where would you like me to send them to?
Thank you Dorris for sharing you woven baskets with me and granting me permission to post them here! I am so excited that you have been having so much success with this project and that you sent me so many wonderful pictures.
I hope your friends and family enjoy their baskets and that once you have them all supplied you will finally be able to make one for your own.
I made tons of these. They are really cool lookin’ when they are done.
Hi Aara!
Yes, I think these woven baskets look like something much more complex and difficult to make when they are finished. I really enjoyed making mine and it looks great.
I am so glad you and Dora have made use of this project. And thank you so much for taking the time to let me know.
Michele
Would these instruction work to make a yarn
covered coiled clothes line cord rug?
Hi Neva,
I would think so. If you are using a more plastic-like cord it might be a little fussier and slippery but other than that, I think it would work the same.
Michele